#DIY glass cutting tools
Explore tagged Tumblr posts
Text
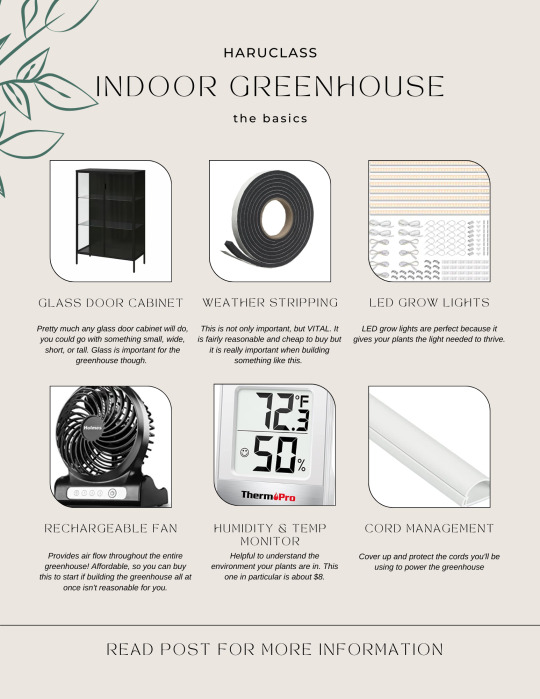
Let's talk about one of my upcoming DIY's! If you love plants but say "oh but I don't have a balcony/lots of light/a yard" this is for you.
The most important thing to note about this entire project is that you need to be intentional about what you're buying and doing. So ask yourself a couple questions:
What kind of plants am I going to grow? How big are they?
Do I need to automate things or will I be able to do everything on my own?
This helps you determine how big of a glass cabinet/greenhouse you need and if you're going to be using smart plugs or not.
Now you can absolutely just buy a damn greenhouse online and put it inside. Don't let no one tell you that you can't. But if you're a DIY hottie and like to do things yourself and learn, you could benefit from doing this yourself.
You'll need some tools, for assembly. Probably a circular hole saw to cut a hole in the bottom of your cabinet, some magnets or something to keep the lights up and basic skills. Also a bowl of water to help humidity can be put at the bottom.
"What kind of plants can I grow?" Basically anything that can fit. Plants that need heat and lots of sunlight should be placed towards the top, plants that are okay with a tiny bit less heat and sun should be at the bottom.
"I don't know what to grow!" Cool, Here's some ideas:
Basil
Parsley
Tomatoes
Green onions
Lettuce
Peppers
Lavender
Rosemary
Chamomile
Dandelion
Garlic
Carrots
Marigold
Generally the more space, the better. So if you can get a really tall cabinet and just use a big step stool to reach the plants, do it! You can also buy acrylic shelves to place inside to promote airflow.
Plants can get big, don't be afraid to cut them down a little if your greenhouse becomes more of a jungle than you're okay with.
You can automate this whole thing (save for the watering, kind of) using smart plugs to turn off the fan and lights. For watering, you can buy self watering plant spikes for some of them (unless you want to water them, then that's fine)!
You'll want fertilizer (you can DIY it, or you can buy something like fish fertilizer), soil, and some pots of some sort.
Groceries have been god awfully expensive and this can help save money over time. Less trips to the grocery store and most importantly- you're not riding on someone else to make the prices for you. You pay for the electricity to run it, the water, the materials, and seeds. That's all you need.
example :

good luck and remember: DIY with caution and care!
#haruclass#greenhouse#plants#planting#planting guide#gardening#indoor greenhouse#diy#food#life hack#life tips
73 notes
·
View notes
Text


Introduction: Using Mirror mounting tape is a creative method to swiftly and effortlessly transform your space without the need for screws or nails.
Advantages of Using Mirror Mounting Tape Easy Installation The days of intricate mounting hardware causing trouble are long gone. The installation process is easy and hassle-free with mirror mounting adhesive. You can connect your mirror securely to any surface in a matter of minutes, which will save you time and effort.
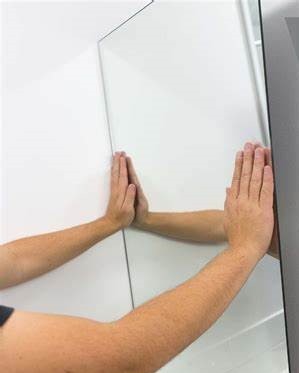
Damage-Free Mounting: Traditionally, mirrors are frequently installed by drilling into walls, which may result in unattractive damage. Instead of worrying about breaking your walls, mirror mounting tape offers a damage-free option that lets you appreciate the beauty of your mirror.

Versatility in Use: Mirror mounting tape is useful for mounting mirrors in a variety of spaces, such as hallways, bedrooms, and bathrooms. It works well on walls, tile, and wood surfaces thanks to its powerful adhesive qualities.
Choosing the Right Mirror Mounting Tape: Weight capacity, surface compatibility, and weather resistance are important considerations when choosing mirror mounting tape.
Weight Capacity: To make sure your mirror can handle the weight, find out its weight before buying mirror mounting tape. Make sure the tape you purchase can withstand the weight of the mirror, as most tapes have a weight capacity listed.
Surface Compatibility: Not every surface can accommodate every type of mounting tape. Certain materials, like glass or tile, may be easier for some to stick to, whereas textured or porous surfaces may be more difficult for others. Make sure the tape you select works with the surface that you want to mount your mirror on.
Weather Resistance Select weather-resistant mirror mounting adhesive if you’re installing a mirror in a bathroom or other damp outdoor area. In humid situations, this will assist guarantee a strong adhesion between the tape and the surface.
Step-by-Step Guide to Mounting Mirrors with Mirror Mounting Tape Clean the Surface: First, make sure the area where the mirror will be mounted is very clean. Clear away any debris, dirt, or dust that might impede the tape’s adherence.
Cut the Tape: Cut the mirror mounting tape to the required length with scissors or a utility knife. To guarantee a snug fit, make sure to measure precisely.
Apply the Tape to the Mirror: Remove the tape’s backside and carefully affix it to the mirror’s back. To guarantee that the tape makes good contact with the mirror, apply pressure.
Position and Press: Place the mirror carefully where you want it to hang on the wall or other surface. Once in place, firmly squeeze the mirror to ensure it stays in that position.
Let it Cure: Hanging weight on the mirror should be delayed until the mirror mounting tape has had time to cure. By doing this, the tape and the surface will be guaranteed to cling firmly and securely.
Creative Ways to Use Mirror Mounting Tape Decorating Walls: Create a gallery wall of mirrors in your living room or bedroom by using mirror mounting tape. Combine various sizes and shapes to create a distinctive and fashionable effect.
Organizing Spaces: Put mirrors in your closet or entrance to make a useful area for glancing in before leaving the house. Mirrors are another useful tool for visually enlarging tiny areas and giving them a feeling of more openness.
DIY Projects: Use mirror mounting tape creatively by making mirrored accent pieces or furniture as part of your do-it-yourself projects. Mirror mounting tape offers endless opportunities for incorporating mirrors into your home’s design thanks to its powerful adhesive qualities.

Maintenance Tips for Mirrors Mounted with Mirror Mounting Tape To ensure your mirrors stay securely mounted and looking their best, follow these maintenance tips:
Regular Cleaning: Regularly wipe off your mirrors with a soft, moist cloth to keep them spotless and clear of smudges and grime.
Avoiding Heavy Impacts :Avoid shoving or bumping into tape-mounted mirrors since this can eventually erode the glue.
Checking Tape Integrity: Periodically inspect the mirror mounting tape for any signs of wear or damage, and replace it if necessary to maintain a secure hold.
Safety Considerations While mirror mounting tape offers a convenient and secure way to hang mirrors, it’s essential to observe safety precautions to prevent accidents or damage.
Weight Limitations: Mirror mounting tape should always be used in accordance with the weight restrictions listed by the manufacturer. The mirror may fall if the weight capacity is exceeded, compromising the tape’s security.
Avoiding Placement in High-Traffic Areas: Avoid mounting mirrors with tape in high-traffic areas where they may be bumped or knocked into frequently, as this can weaken the adhesive bond.
Checking for Loose Ends Regularly: Regularly look for any indications of loosening or peeling around the attached mirror’s edges. Reapply the tape as necessary to provide a tight hold if you see any problems.
Conclusion Mirror mounting tape makes it easier than ever to use mirrors to transform your area. Mirrors provide elegance and practicality to any area in your house, and they are simple to install, damage-free to mount, and incredibly useful. Mirror mounting tape provides an easy-to-use and efficient way to install mirrors securely without using screws or nails, whether you’re doing DIY projects, organizing areas, or decorating walls.
#mirror mounting tape#damage-free mounting#easy installation#versatile adhesive#wall mounting#mirror installation#DIY home decor#adhesive tape#home improvement#mounting solutions
2 notes
·
View notes
Text
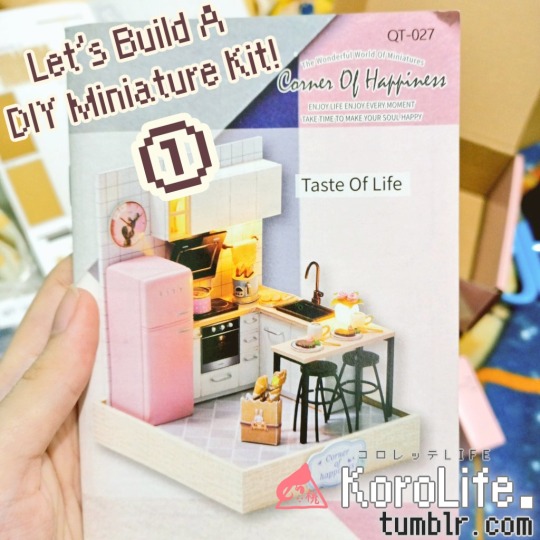
Blog No.002🍋 24年5月4日
「Working on My Very First Miniature Kit!」
Hi, this is a behind-the-scenes on my experience in making the Corner of Happiness: Taste of Life DIY miniature kit!
It was from a couple of years ago, we found a stall selling miniature craft kits while strolling around the mall. My sister bought me the very same model I've been eyeing on my online shopping cart as a birthday present.
Me and my sister both love miniatures since we were very young, but making them from scratch require a lot of time, materials, and tools we don't really have (especially if you don't want them to look crudely made). Luckily, now with a Do-it-yourself kit, that wasn't going to be much of an issue! ...or so I'd hoped as a miniature newbie.
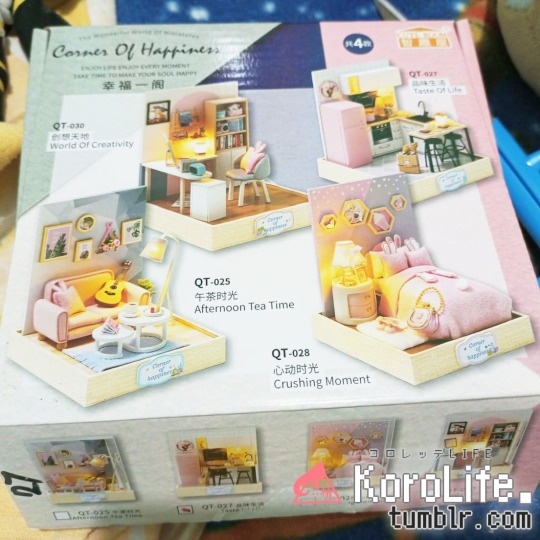
These are all the other variants of this series. I really dig the pink bunny aesthetics they're going for, though it's not as apparent on this one.
The kit also included custom wooden parts, wires, beads, and a tool kit necessary for the build. It also comes with an acrylic glass for dust-free casing!
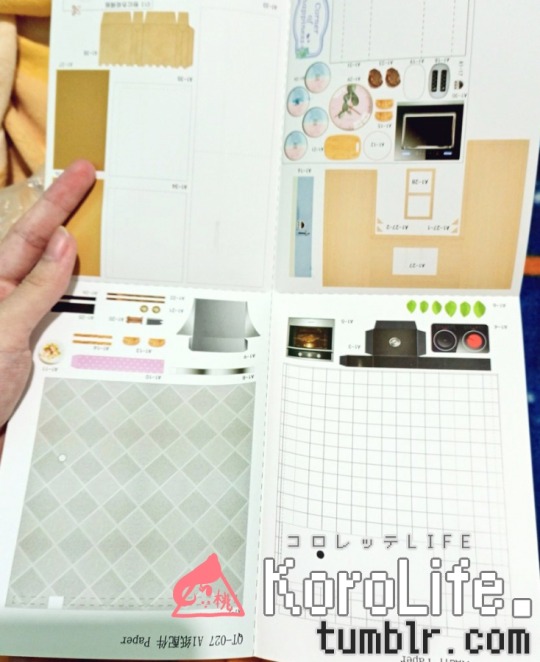
Most of the parts were made from a print-out glossy paper with all the items' photo-real textures; some of which are just to be pasted onto a harder material like wood shaped similarly to the object, but most of them are just the paper itself.
I guess doing it this way cuts costs for manufacturing, but it was very challenging to work with, in my opinion. You'll see what I mean in a bit.
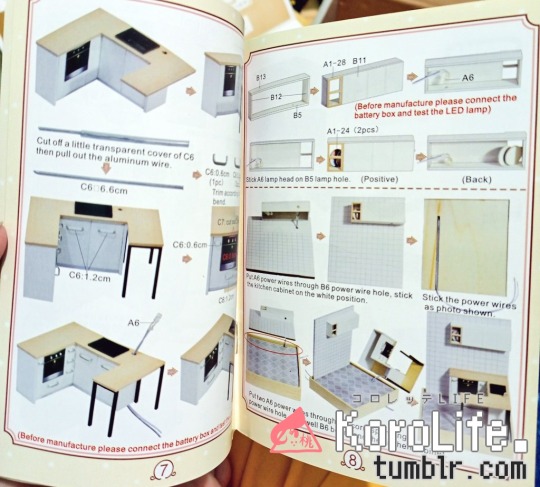
And here's a preview of the instruction booklet's contents.
I thought it was worded weirdly at parts, but still understandable enough with plenty of visuals to go with it.
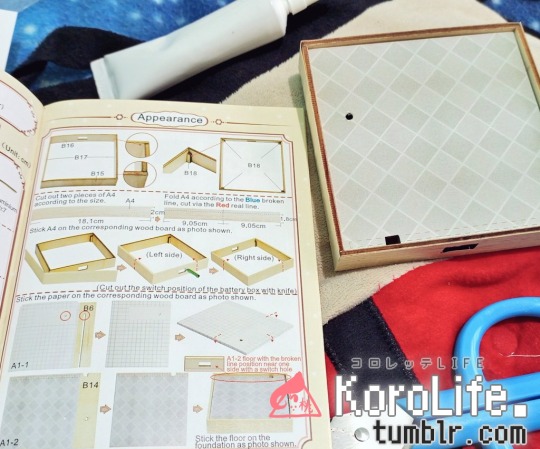
Starting with the base/foundation of the model before anything else seemed to be the best option... though I was very, very tempted to skip to work on the food items. I don't know why, but miniature food just gets me really giddy.
But, gotta hold backーcan't make food without the oven and all.
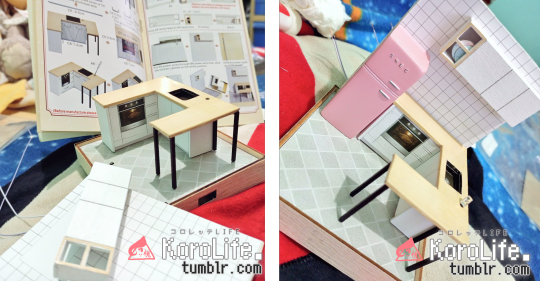
I then worked my way through the biggest parts and set them down permanently with the paste provided in the kit.
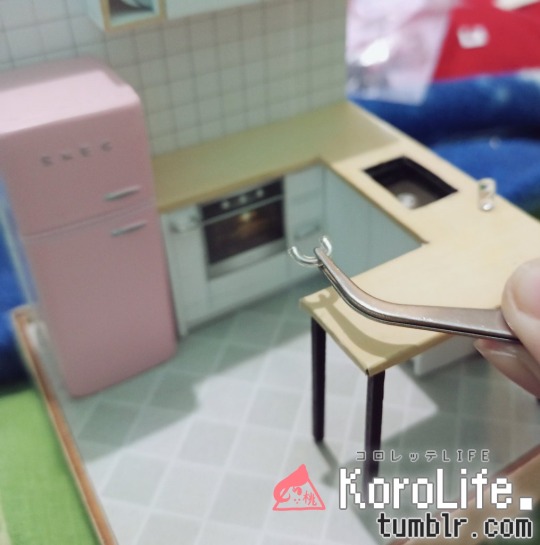
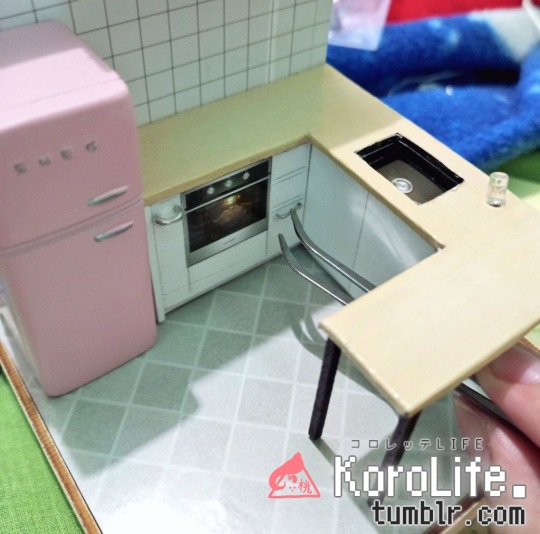
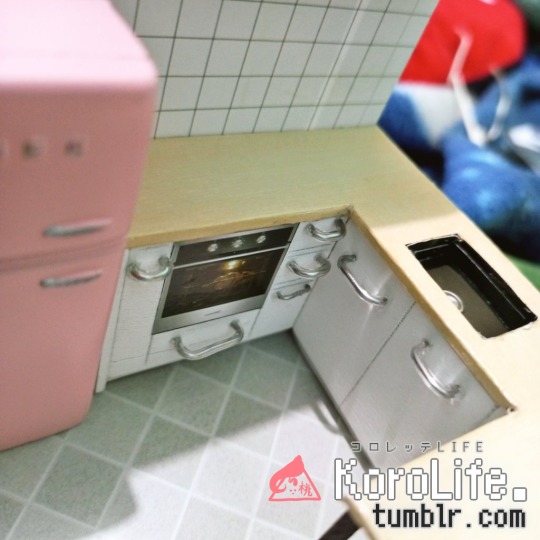
...but I probably shouldn't have glued the kitchen island in place before placing the handles...aiyah one of them is really crooked-
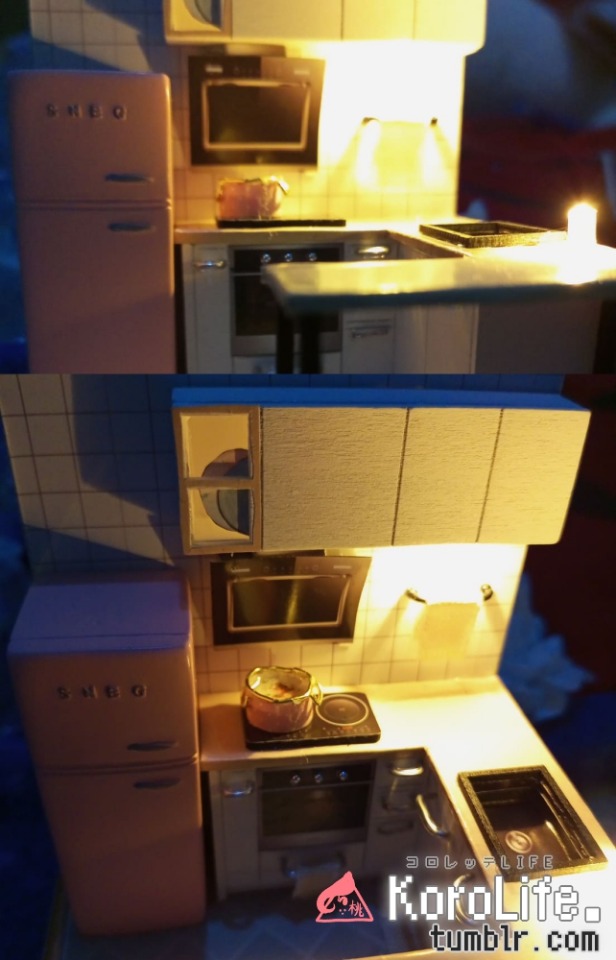
I'm not familiar with wirings, so setting up the LED lights made me panic a little. But somehow, it all worked out! I'm confident that if an idiot like me can get through this, so can anyone!!
And now I present to you: The Paper Struggles™
+ and a "It's so fakken small" compilation.
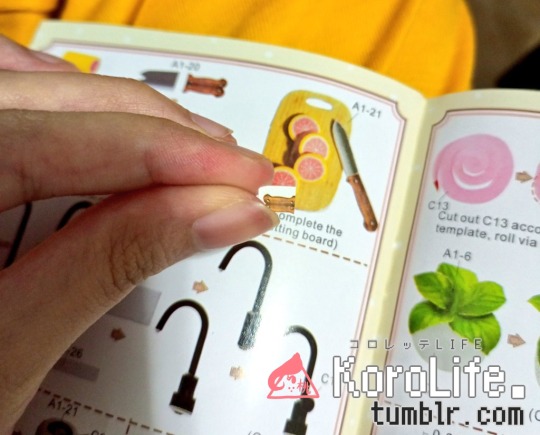
The booklet is a lie lol that knife .jpg is 5x bigger than what you've got to work with-
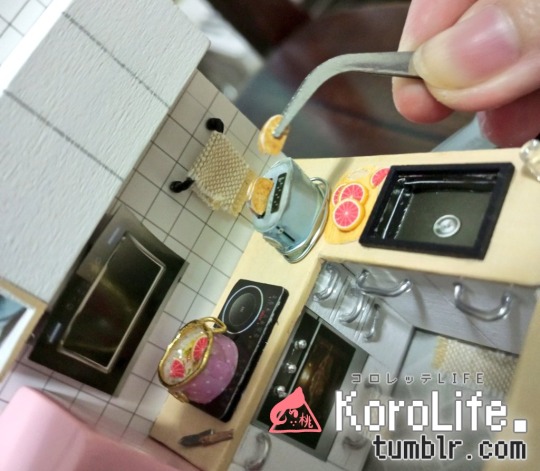
I remember both bread toasts being squished from the tweezers... thankfully tiny enough for anyone to really see, but there's definitely a shtload of dents on there...
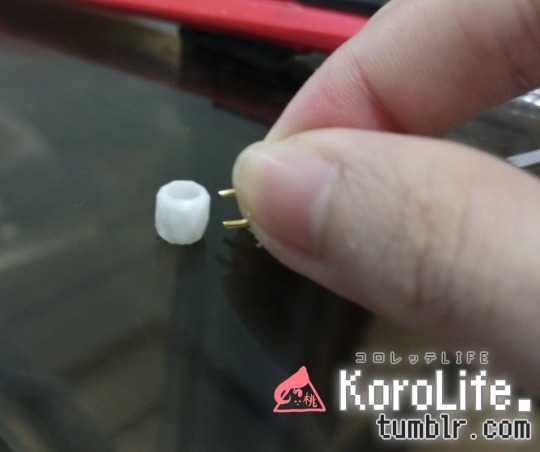
The wire handles for the mug was such a struggle lol it kept falling off no matter what, so I just kept adding glue and just... held on to it with pressure against the bead for what felt like eternity until it dried completely.
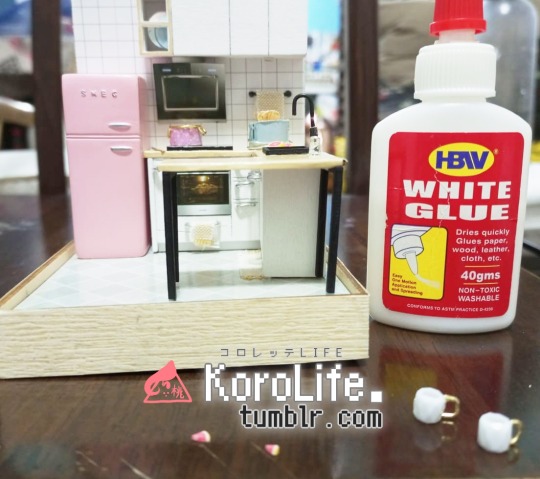
I also remember struggling with the semi-origami flowers quite a bit, but I think the trauma of it all made my brain forget to take photos-
Next up are the wires. I never really considered it before this kit, but they can actually have a lot of use when it comes to making miniature furnitures and accessories.
This was unfortunately before I got into making earrings, so I didn't have the right tools (pliers) to straighten them out. The very thin tweezers that came with the kit didn't help that much, so I just had to use my fingers.
The results... are as wobbly as the hands that created them lol I've learned my lesson...
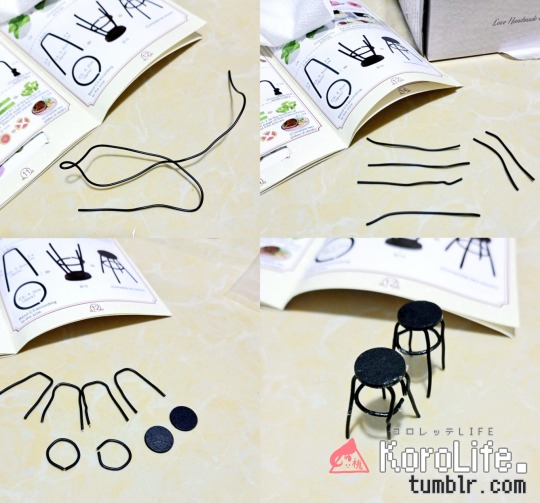
that incomplete circle pains me so
And here we have my favorite partーthe food! All the tiniest of detailing, the garnishing, the arrangements... it just makes me so happy, I really don't understand why.
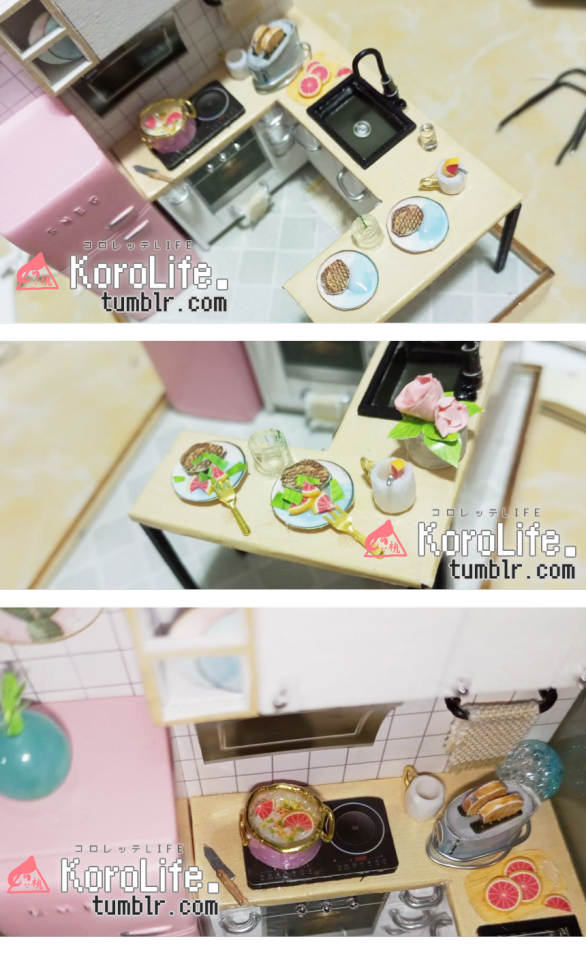
The original instructions only intended the oranges to be on the chopping board, but not in this household!!!
Oh, and the oranges were sliced up polymer clay rolls that I know are popularly used as nail art? Me and my sister used to sell polymer clay accessories back in the day and it felt very nostalgic seeing those tubes again.
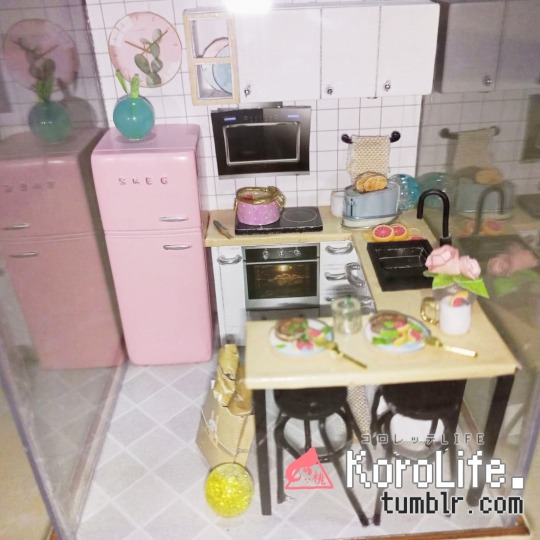
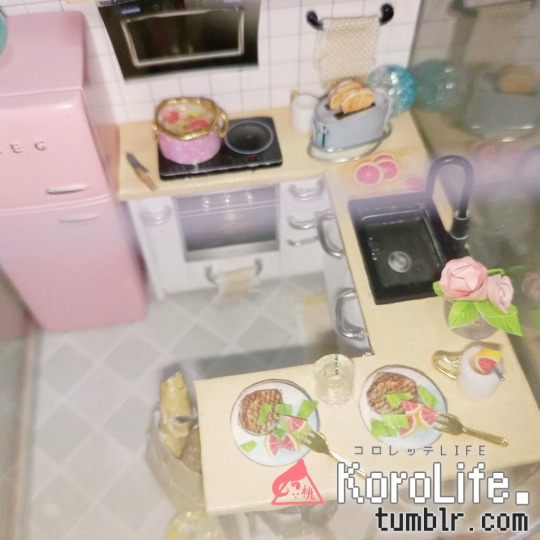
And here we have the finished model! ☆
I made a few changes from the original intended 'look' + added a couple of my own beads from my hoard material collection from childhood I planned on using for when we started making miniatures... and the time for use was most certainly now!
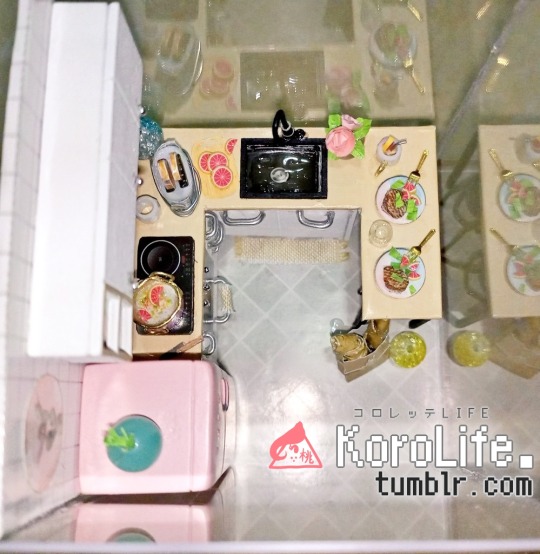
Aaand here's a bird's eye view before completing with the dust-free acrylic glass encasing top lid.
~ CONCLUSION ~
Overall, I thought it was really fun, despite the unforeseeable challenges along the way. Even as a newbie with little to no experience working on actual builds + with only the enthusiasm and love for miniatures to desperately cling to when the damn wires wouldn't stick on their corresponding surfaces properly... it seemed to turn out pretty OK!! I expected a whole lot more screaming and dying inside lol If you're interested in getting it, I think simply searching up "Corner of Happiness" or "Taste of Life DIY miniature kit" should get you some results on your preferred online shopping platform! ※NOTE: I do have to stress to make sure to check (either through other user reviews or the listing's description) if the seller is including a tool kit in your purchase. A lot of the items included in this kit you can probably find at home, but not a lot of people are so crafty to just have them lying aroundーespecially if you're a complete newbie with crafts/miniatures! You'll have a hard time trying to wing it without tools. ※also, they might just skimp on you by not including them, but still have you pay for the full price lol it's definitely worth considering when purchasing.
I know a lot of parents may see these kits to buy for their kids, but unless ➀ they're also helping out the kid in the process or ➁ if the kid in question has no interest or patience for these kind of things, I think it's best not to buy them DIY kits like these if you don't want to risk wasting money. But that's just my opinion, as a broke adult who's always wanted one of these haha
The amount of care, effort, and attention to make sure everything is sturdy enough and visually clean can be very drainingー but if you're willingーanyone can do it!
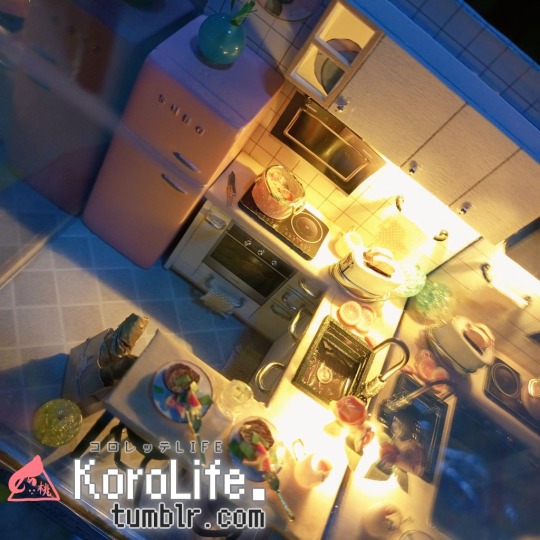
And of course, a final very cool look on LED lights turned on at night.
This project was done around 2022年. I've done one more miniature kit since then that was way more complex, but that's a whole 'nother journal entry for another day...
For now, here's a mini update of how this Taste of Life is hangin' after two years have passed:
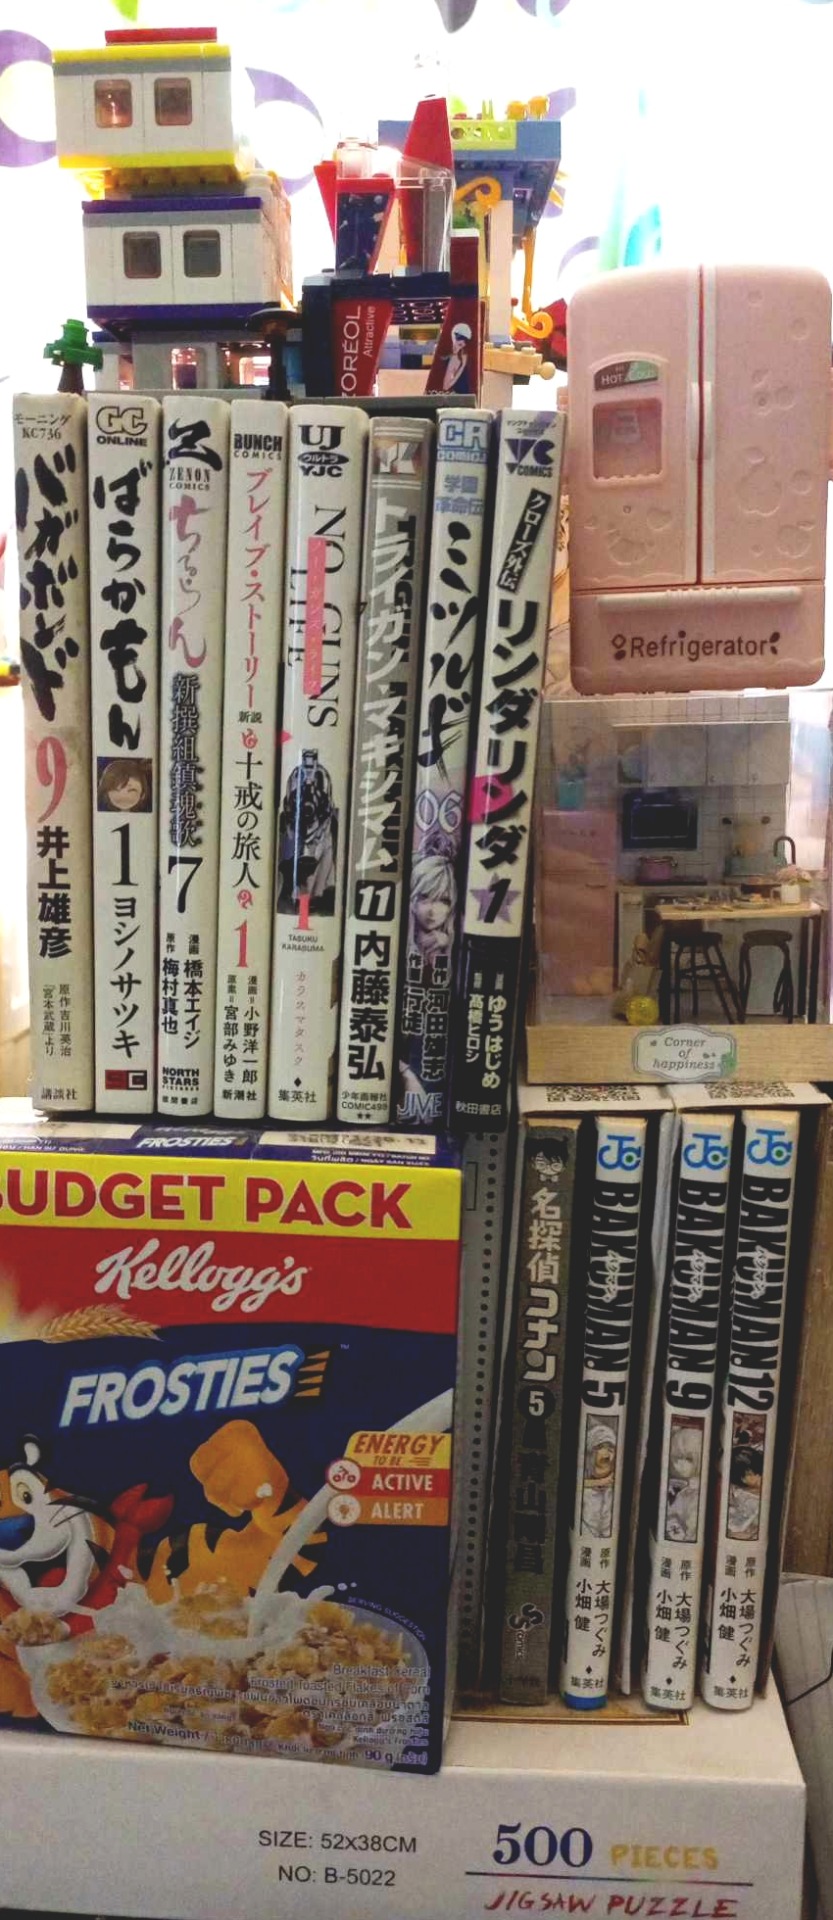
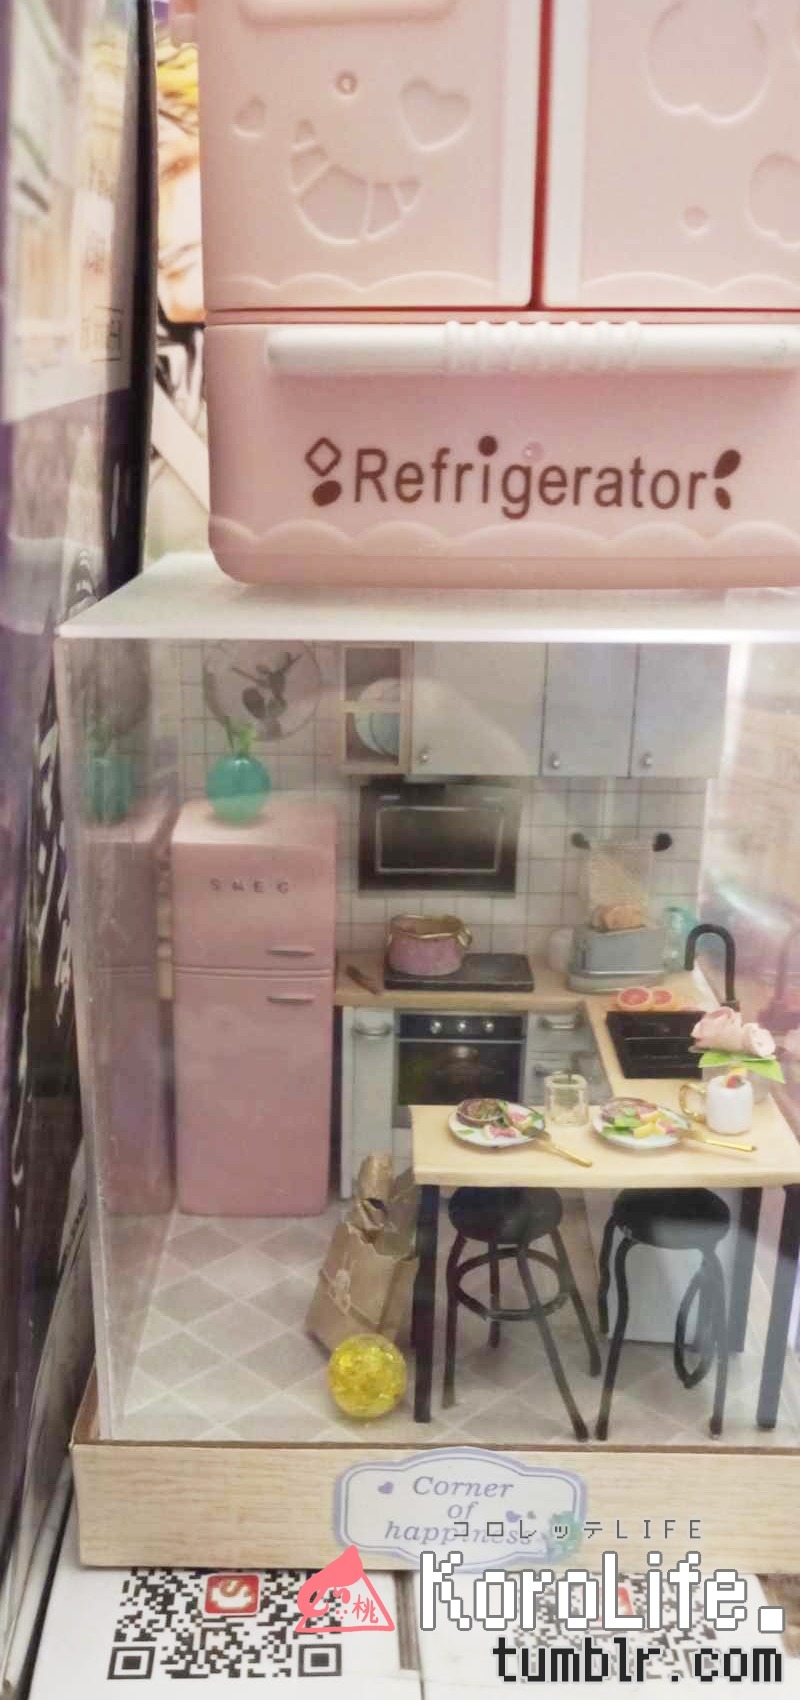
please don't mind Mr. Gamma side-eyeing you in the BG-
The batteries for the LED unfortunately need replacing and one of the wire chairs kind of died a bit, but it's still alive + currently displayed and part of my makeshift not-all-Shounen Jump Manga corner! I might make a separate blog about that too...
But until thenーthanks for reading ( ´ ꒳ ` )⸝ see you in the next one!★
#crafts#miniature#miniature model#kitchen#taste of life#corner of happiness#diy#diy kit#review#miniature dollhouse#miniature craft#craft kits#diy dollhouse#diy miniature
5 notes
·
View notes
Text
DIY Large-scale Picture Frame

Project by Erica Loesing:
Tools + Materials
-Large print/photo/something pretty to frame (see tips below!) -White illustration board (make sure it’s thick/dense enough to stand without waving) -Acrylic sheet (such as Plexiglass, I used a 32 x 44 inch sheet) -Spray mount -Straightedge + utility knife -4 wood boards (I chose 1/2” x 2” Poplar – you won’t want much narrower than this) -Pencil -Tape measure -Saw + miter box -Fine sandpaper or sanding block -4 corner braces (I used 1/2” x 2.5″), + tiny screws that won’t puncture the face of your wood frame -Drill + Phillips bit (could use a manual Phillips screwdriver, too!) -Square tool -Wood glue (I like Elmer’s) -Paint or stain (I used a black satin spray paint) -Turn buttons (I used nylon) -Large picture hook (you may need a hammer to attach this)
Notes
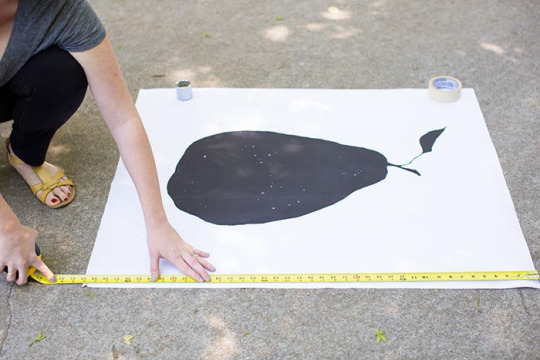
Somewhat of a secret is that most office store print shops (I used Staples) offer something called an “engineer print.” Large-scale prints for only a few dollars! So that’s what I did here. I had this super cute pear illustrated and then printed nice and big in a matter of hours for only a few dollars. (I have also seen people print photos using this process and have great results!) The paper is pretty thin and the print isn’t necessarily photo quality, but I think it works so great for this application and would totally recommend it if you’re mindful of your costs and feel it wouldn’t compete with the aesthetic of your project.
Now I want to mention a few constraints here. Of course there will be a maximum print size at your local print shop (most likely 36 x 48 inches). But the largest acrylic I could find locally was 33 x 44 inches. So I sized my print to be no larger than this, choosing 33 x 40 inches. And here are the reasons I chose acrylic over glass — while it does have more size restrictions (yet you can typically buy larger pieces of acrylic than glass at a basic hardware store), the acrylic is very lightweight (and I didn’t want to have to build a frame within my frame to support glass), you can cut it with a knife (and they’ll also cut it down for you in the store, typically for free!), and it won’t shatter. I just didn’t have the courage to handle such a large sheet of glass. The downsides are that it is, well, plastic and not glass, and I think it tends to have a bit more of a glare. I don’t love that you can tell it’s acrylic, but again, I was trying to be mindful of costs, time, and my low skill level. And honestly, I never notice it now that it’s hanging on the wall.
How-to
First, spray mount your print to a board. Since my print was on thin paper with a lot of negative space and you could sort of see through it, I used a white illustration board to back it. You want to use something that isn’t too thick (the thicker this backing is, the further from the wall your frame will rest), but also something dense enough that can stand on its own without waving or warping. This will be the backing of your frame. I first tried sandwiching everything together without mounting, but since my paper was so thin it looked terrible behind the glass (since it’s so large and gravity wants to pull it to the bottom). Also, if you are using something thin like I was, be extra careful for bubbles and other ugly errors when spray mounting. I may or may not have had to redo mine the first time around…
You can now trim the mounted print down to whatever size you’d like it to be, keeping in mind the size constraints of the acrylic. Measure your print. You want your acrylic to be about the same size as your mounted print. Again, you can have this cut exactly to size at your hardware store. Or, if you’re feeling up to it, acrylic sheets can be cut at home with a utility knife and a straightedge! You don’t even have to worry if your edge isn’t perfect because it will be hidden behind the frame.
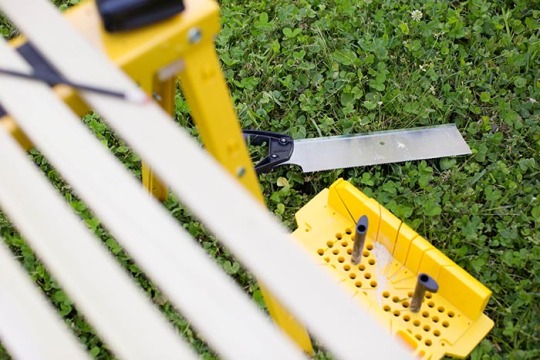
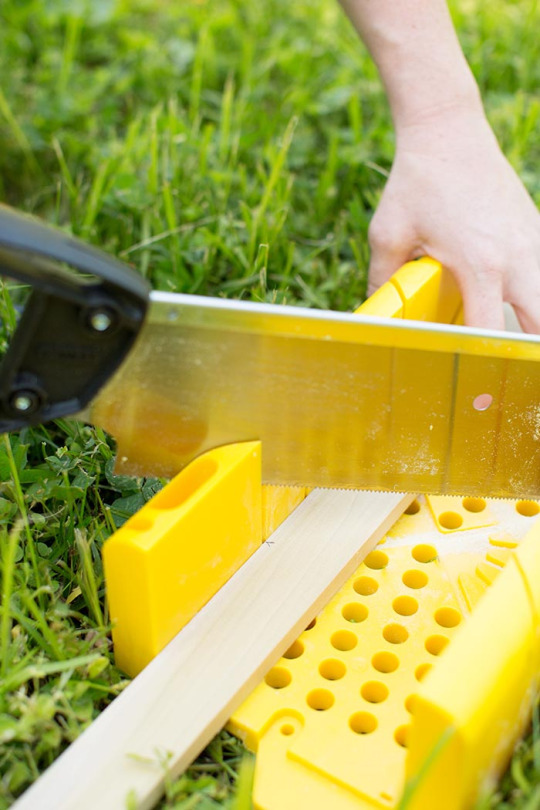
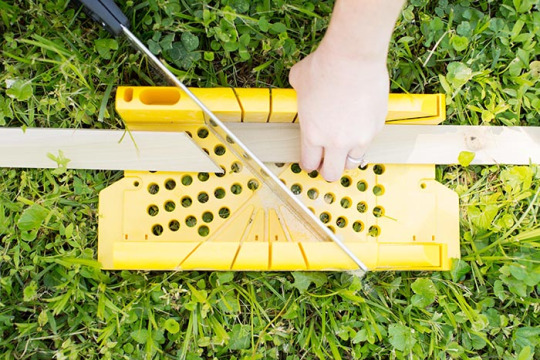
Moving onto the frame. All you need for this step is a pencil, a tape measure, a saw, and your four wood boards. (For this step I set up my wood on sawhorses in my backyard, but the sawhorses aren’t necessary. I just prefer working at table height.) I created mitered corners for my frame, which is typical for framing, so I also used a miter box for accuracy, which came with my saw. I love that I can get the exact angle I need, and everything will fit together nicely without needing any fancy tools or causing extra frustration. Of course you could opt for square corners and skip this step! Or use a power saw, or a handy friend! There are a bunch of ways to achieve the look you want.
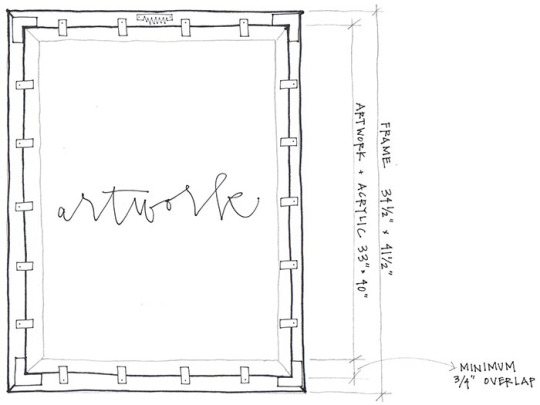
When measuring your boards, first consider the size of your mounted print + plexiglass. Then consider the size of your corner braces and how much space you’ll need to leave for them. (I would sketch this out. See below for the sketch I did for my project, based on the measurements I was using.) Obviously, you want the interior measurement of your frame to be overlapped by your plexi/print, and I recommend planning for a solid 3/4” on all sides.
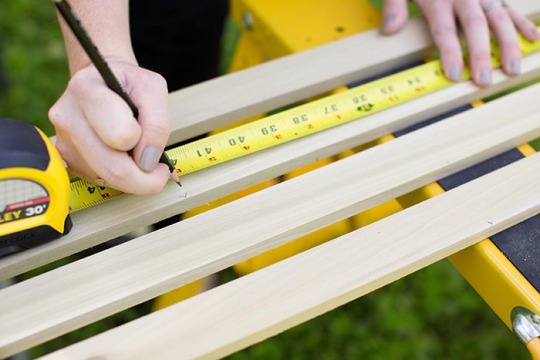
Using your saw, cut your measured boards down to size, at 45-degree angles. You want your frame to be as square as possible, which means cutting equal angles and equal lengths. I always check mine after each cut to be sure.
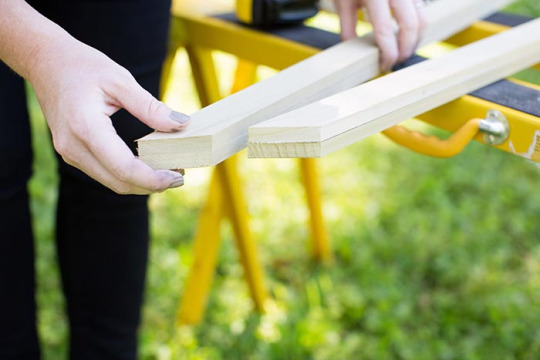
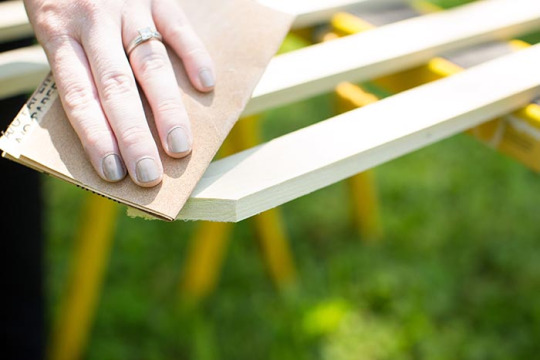
Once all four boards are cut to equal size, use a fine sandpaper or sanding block to sand the rough edges.
Now we are ready to assemble! For this step you need wood glue (I love Elmer’s), and I also like to use a square tool to check that the corners meet up nice and, well, square. Apply wood glue to each mitered end, and join your frame together, checking your corners with the square as you go. Give the glue a little bit of time to dry. Now, you could choose to stop here. Depending on the size of your frame and how tight your mitered edges meet, maybe you don’t need the corner braces. While the wood glue is surprisingly strong, I still chose to use the braces, just for peace of mind that my frame would stay together when it was all said and done.
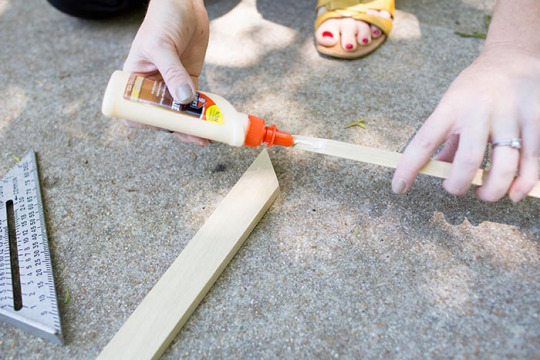
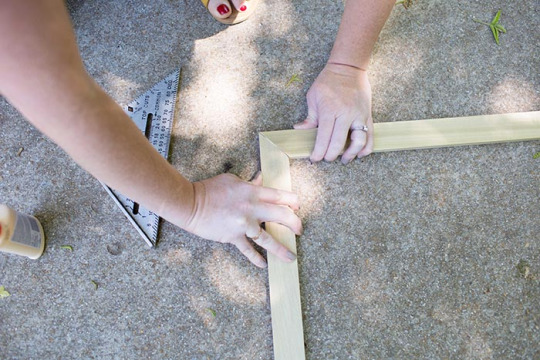
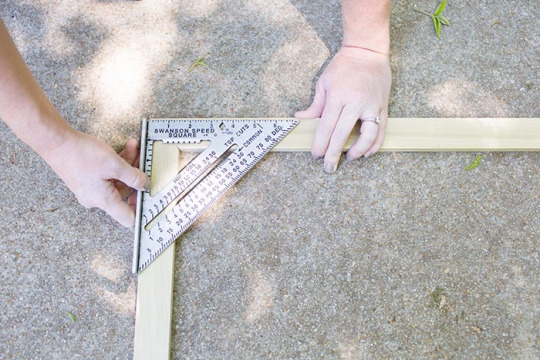
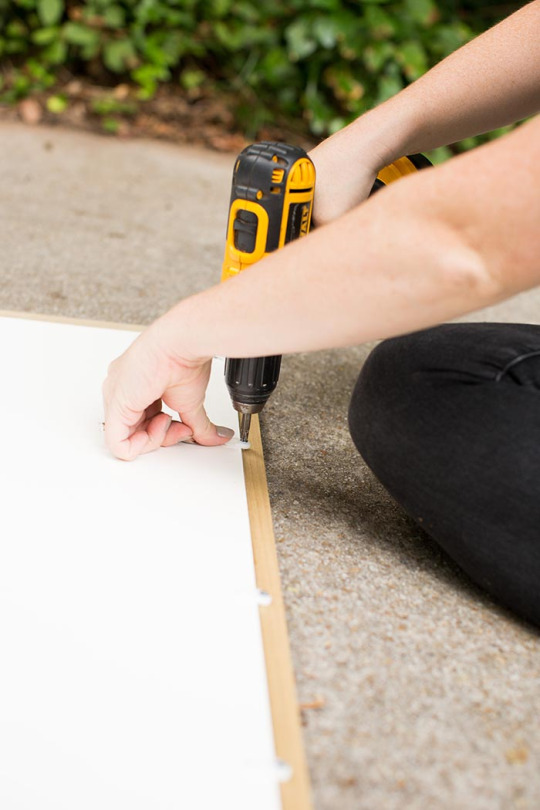
The corner braces are as simple as screwing them into place, one at each corner. (Be sure to choose screws that will not poke through the front face of your frame. I had to buy smaller screws than the ones that came with the braces.) It is helpful to place your print/acrylic sheet on the glued frame at this point to use as a guide; be sure there is enough space for the braces to be screwed outside the outer edges of your acrylic. The braces make a nice little shelf on the bottom for the print to rest upon, too! (I recommend marking the location of each of your four braces with your pencil.) Once the brackets are screwed into place, flip the frame over and use your square to once again check your corners. If everything looks good, hooray! As a final detail I like to use a little bit of the wood glue to fill any open spaces where the corners meet on the front face of the frame, especially if you will be painting over it. This is the last step using the wood glue. Once this dries, use your sandpaper to lightly sand all of your faces and edges that will be visible when displaying your frame.
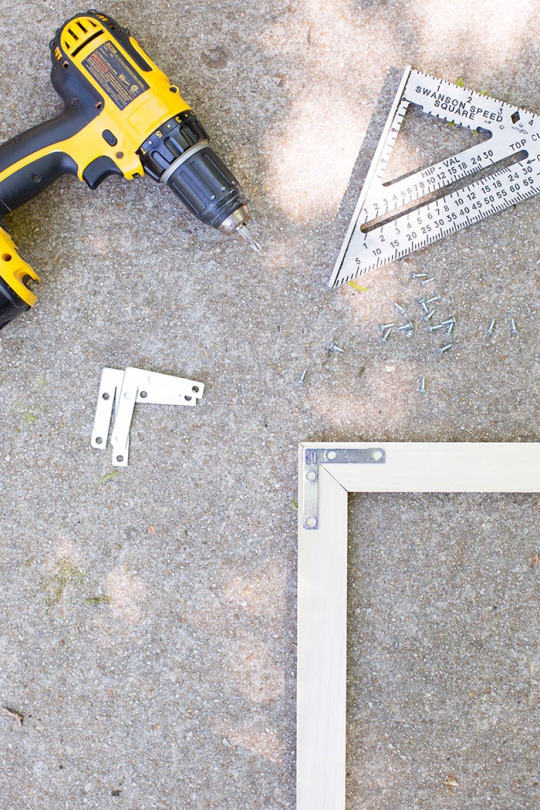
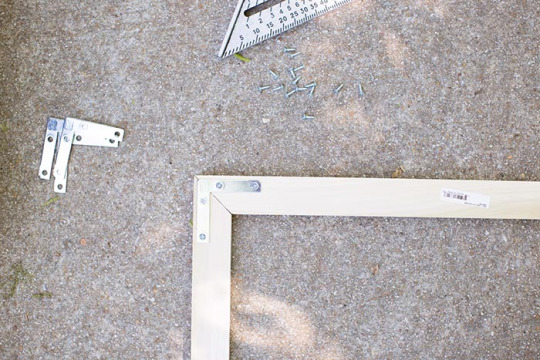
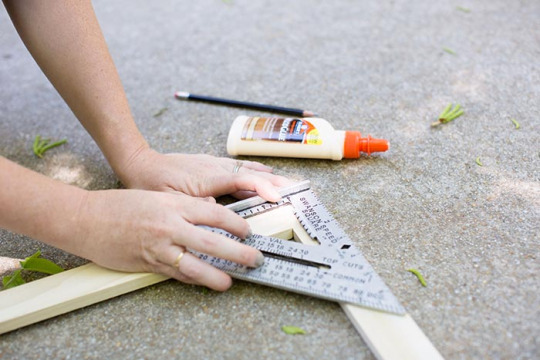
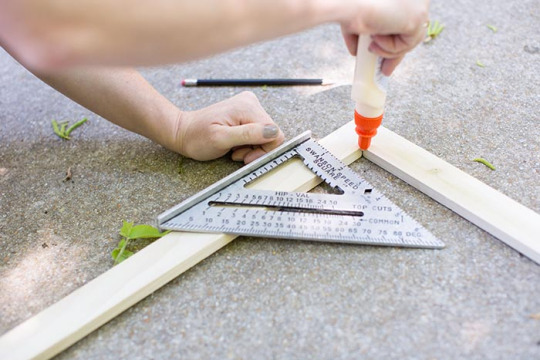
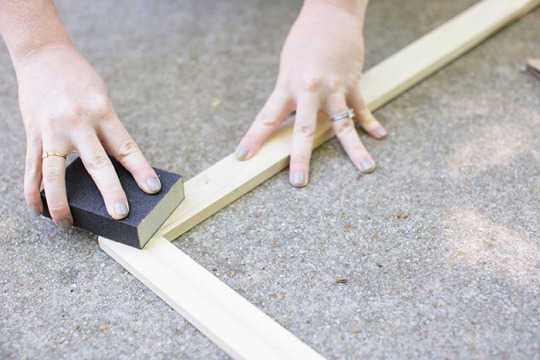
Time to paint! I chose to spray paint my frame in a black satin. You could choose to leave the wood bare, stain it, or paint it any color of the rainbow.
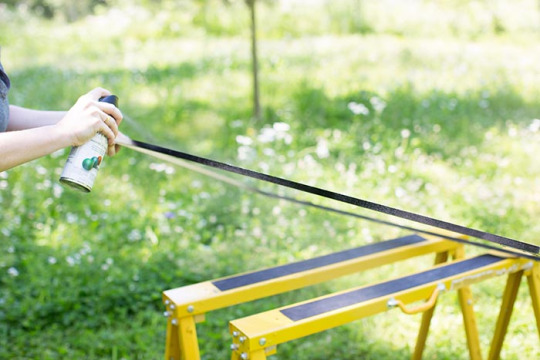
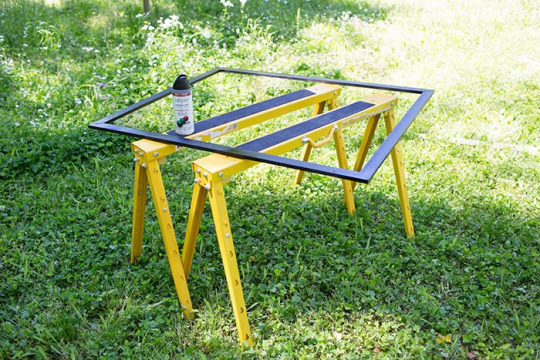
Once your paint is dry, flip the frame over and set your print + acrylic into place. During this step I finally removed the protective coating from my acrylic. I like to keep it on as long as possible to prevent any scratches. Note that the acrylic is extremely attractive to any bit of dust or dirt or whatever may be nearby. (In hindsight, I would have done this step inside on a clean surface.) Time to install your turn buttons. Just like the corner braces, these are as easy as simply screwing in place. They are the same as you’ve probably seen used on a wall mirror. Again, check the length of screw you’re using given the thickness of your wood frame. For the size of my frame I used five turn buttons up the sides, then four at the top and bottom. (Avoid placing one in the center of the top, since a picture hook will eventually go here!)
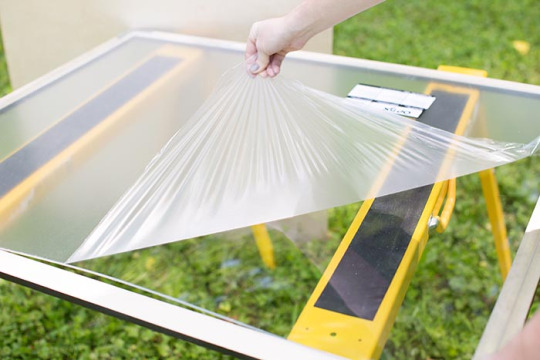
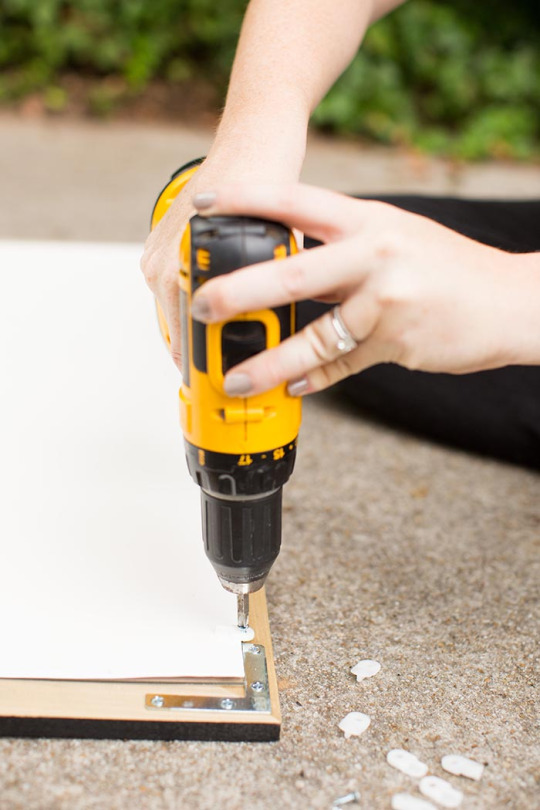
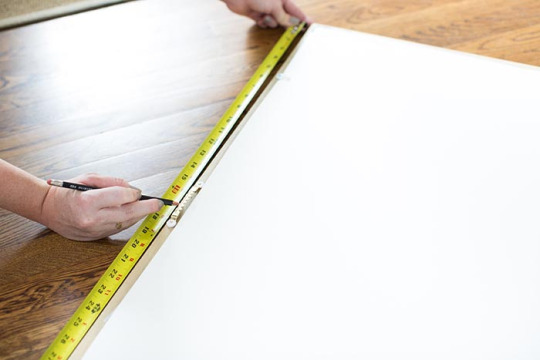
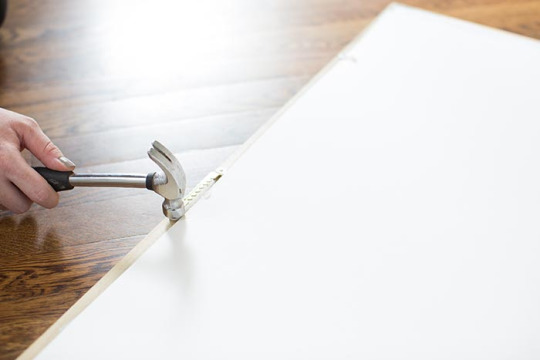
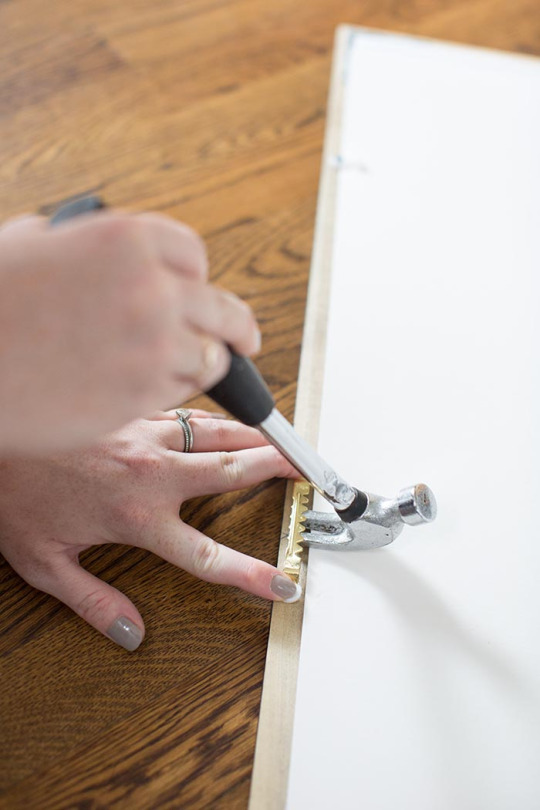
It will be so tempting to flip your frame over and call it a day, but there is one more tiny step! Measure across the top of your frame and mark the center point. Use this mark to install a picture hook if you plan on hanging your frame (probably using a hammer). I chose the largest picture hook I could find to accommodate the thickness of the backing. If you choose too small of a hook, the frame may not hang flush on the wall, but instead protrude out at the bottom. Even though I used a really large picture hook I still went back and used the back of my hammer to bend it slightly outward to accommodate the board + turn button thickness.
VOILA! My frame is hung and I am just so pleased with the result. It’s large and cool and makes such an impact for only a little bit of cost + skill. And I was glad to spend a pretty day outside working with my hands and building something I could show off on my otherwise big, blank wall. I hope you will be able to follow my instructions and learn from my many mistakes on my first go-round, but please don’t hesitate to ask if you have any questions!

7 notes
·
View notes
Text
3 recipes for making Wax seals at home
Wax seal making materials are kind of expensive so I wanted to find a way to make them at home with accessible materials. These are the three ways I found work well. Each one of them have advantages an disadvantages.
Materials:


Different color crayons cut up in chunks of about 1/2 a cm.
Hot glue sticks also cut up in the same sized chunks.
Candle wax in 1/2 cm chunks.
Tea light candles or other type of candles.
Metal spoon. The bigger the easier it will be.
A stove for melting wax, it can be homemade (optional, but it makes things easier)
A surface to pour the wax on. Could be glass or a piece of stone/marble countertop
Oil. It helps removing the seals from the chosen surface, especially the hot glue seals.
Stamps. These are made with two part epoxy, lino, coins and even laser engraved acrylic.

FIRST RECIPE:
The easiest one of the three, the only thing you need is a hot glue gun and some hot glue sticks.


Pour a glob of the hot glue in your surface of choice and put the stamp on top of it.
Advantages:
- The easiest to setup
- Doesn't require candles or spoons
- It produces detailed seals
- It's really flexible
Disadvantages
- The texture is not waxy
- Needs paint it if you want color
- It's too flexible
- Needs oil to remove it from surfaces
SECOND RECIPE:
This one only requires one more ingredient: crayons.
Like stated above I've cut up the crayons and the hot glue in pieces approximately the same size.
The ratio is: 3 parts hot glue per 1 part crayon.


You should put the hot glue first because it takes the longest to melt.
Then add the crayon and mix it up using whatever tool you have.
When it's combined pour it on your surface of choice and put the stamp on it.
Advantages:
- You can choose whatever color you want
- Has a fair amount of detail
- Texture is more waxy
- A little flexible
Disadvantages
- Requires more setup and materials
THIRD RECIPE:
The most elaborate of the three but still fairly simple.
Requires candle wax on top of the other two ingredients.
The ratio is: 2 parts hot glue, 1 part crayon, 1 part candle wax


Again, put the hot glue first to let it melt.
Then add the crayon and the candle pieces.
Pour and put the stamp.
Advantages:
- You can choose whatever color you want
- The most waxy texture
Disadvantages
- Requires the most setup and material
- Kind of brittle
- Not much detail
RESULTS:
This is a comparative table showing the 3 wax recipes and how they look with different types of diy stamps.

You can add glittler, mica powder or makeup powder to make your stamps shiny.
6 notes
·
View notes
Text
I must draw attention to the dwindling ranges available for the DIY grandpas; as their natural environment, the full-service neighborhood hardware store, is becoming rarer and rarer. Without glass cutting, tool sharpening, and key copying stations these majestic beasts cannot engage in the social interactions crucial to their well being.
*releases pack of dads into home depot* go……be free
982K notes
·
View notes
Text
Broken Lava Screen? Here’s the Best Solution for You
A broken mobile screen can feel like a disaster, especially if you rely on your phone daily. Lava mobile phones are known for their durability and performance, but even they are not immune to accidents. Whether you dropped your phone or accidentally pressed it too hard, a cracked screen can disrupt your daily routine. Fortunately, there’s a reliable solution for Lava mobile phone repair and screen replacement.
In this article, we’ll explore the best steps to take when your Lava screen breaks and introduce you to a professional service that guarantees a hassle-free repair experience.
Why is Lava Screen Replacement Important?
The screen is one of the most critical components of a smartphone. It doesn’t just display visuals; it also serves as the primary interface between you and the device. A damaged screen can lead to several issues:
Touch Sensitivity Problems: A cracked screen may not respond accurately to your touch. This makes even simple tasks frustrating.
Display Damage: Cracks can worsen over time, potentially distorting colors or causing dead pixels.
Safety Concerns: Broken glass poses a risk of cuts to your fingers.
Device Longevity: Ignoring screen damage can lead to further internal damage.
To avoid these problems, you should address screen damage as soon as possible.
Steps to Take When Your Lava Mobile Screen Breaks
1. Stay Calm and Assess the Damage
Accidents happen, but panicking won’t help. Examine your phone carefully. Check whether the crack is superficial or if it has affected the display and touch functionality. If your phone is still usable, avoid applying pressure to the damaged area.
2. Back Up Your Data
Before proceeding with any repairs, ensure your data is safe. Use cloud storage or connect your phone to a computer to back up important files, photos, and contacts.
3. Avoid DIY Repairs
You may feel tempted to fix the screen yourself using online tutorials and repair kits. However, mobile screens are delicate, and one wrong move could cause more harm than good. DIY repairs often lead to incomplete fixes or additional damage.
4. Choose a Professional Repair Service
Instead of experimenting, trust experts for Lava mobile screen replacement. Professional repair services have the right tools, experience, and genuine parts to restore your phone to its original condition.
Why Zomit is the Best Choice for Lava Mobile Screen Replacement
When it comes to reliable mobile repair services, Zomit stands out as a trusted name in Bhopal. Our team specializes in handling Lava mobile phones, offering quick and efficient solutions for screen replacement and other repairs.
Key Benefits of Choosing Zomit:
Expert Technicians Our team consists of highly skilled professionals with years of experience in mobile phone repairs. They understand the intricacies of Lava devices and ensure your phone is in safe hands.
Genuine Replacement Parts We use original or high-quality compatible screens for Lava mobile phones. This ensures optimal performance, durability, and a seamless experience after the repair.
Quick Service We value your time. Most screen replacements are completed within a few hours, so you can get back to using your phone without delay.
Doorstep Repair Option For added convenience, Zomit offers doorstep mobile repair services in Bhopal. You can schedule a technician to visit your home or office, saving you the hassle of visiting a service center.
Affordable Pricing Our Lava mobile phone repair services are reasonably priced, ensuring quality without burning a hole in your pocket.
How to Get Your Lava Screen Repaired with Zomit
Getting your broken Lava mobile screen repaired is simple and stress-free with Zomit. Follow these steps:
Contact Us: Reach out to us through our website or customer support number to book your repair service.
Choose Your Service Option: Decide whether you want to visit our service center or opt for our convenient doorstep repair service.
Hand Over Your Device: Provide your phone to our technician. They will inspect the damage and confirm the repair cost.
Get It Fixed: Our technician will replace the broken screen using the best tools and parts.
Enjoy Your Phone: Once the repair is complete, your Lava phone will look and function like new.
Prevent Future Screen Damage
While Zomit can fix your Lava phone screen quickly, prevention is always better than cure. Here are some tips to keep your phone safe:
Use a Screen Protector: Tempered glass or film protectors add an extra layer of security.
Invest in a Good Case: A sturdy case can absorb impact and prevent cracks during accidental drops.
Avoid Careless Handling: Keep your phone away from the edges of tables and avoid using it with wet hands.
Final Thoughts
A broken Lava screen doesn’t have to disrupt your life. With the right repair service, your phone can be as good as new in no time. At Zomit, we specialize in Lava mobile screen replacement, offering a blend of expertise, convenience, and affordability.
So, if you’re in Bhopal and need reliable Lava mobile phone repair services, don’t hesitate to contact Zomit. Let us take care of your device while you enjoy peace of mind. By following these tips and relying on professional repair services, you can extend the life of your Lava phone and keep it performing at its best!
0 notes
Text
Mastering the Art of Spray Painting: A Comprehensive Guide
Spray painting is a versatile and efficient technique used for transforming surfaces with precision and creativity. Whether you're giving a new life to furniture, updating walls, or creating stunning artwork, spray painting delivers flawless results with minimal effort. This modern method is widely favored for its ability to provide smooth, even coverage while cutting down on the time needed for traditional brush painting.
One of the primary advantages of spray painting is its adaptability. It works effectively on a variety of surfaces, including wood, metal, plastic, and even glass. However, achieving professional-quality results requires more than just picking up a can of spray paint; preparation, technique, and attention to detail are essential. By following the right steps, you can turn any surface into a masterpiece while ensuring durability and aesthetic appeal.
Preparation is Key
Before starting your spray painting project, thorough preparation is crucial. Begin by cleaning the surface to remove any dirt, grease, or old paint. Sanding the area will ensure that the paint adheres properly. For furniture or intricate items, consider using a primer as a base coat, which enhances the longevity of the paint and prevents chipping. Proper masking with tape or covers is also necessary to protect areas that you don't want painted.
When preparing for spray painting, working in a well-ventilated area is important. Ideally, choose an open outdoor space or a room with proper ventilation. Protective gear, such as masks and gloves, will safeguard you from harmful fumes and accidental spills.
Techniques for Perfect Results
Spray painting is an art that requires patience and a steady hand. Holding the spray can at the correct distance—typically 6 to 12 inches away from the surface—is essential to achieve an even coat. Start with light, sweeping motions, overlapping each pass slightly to avoid streaks or uneven coverage. Avoid overloading the surface with paint, as this can cause drips or pooling.
For larger projects or complex designs, consider using professional-grade spray painting equipment. This allows for greater control over the paint flow and pressure, leading to more precise results. Professional tools are often used in Premium Decorating Services, ensuring that surfaces are coated uniformly and efficiently, regardless of their size or complexity. These services combine technical expertise with high-quality materials to deliver impeccable finishes that stand the test of time.
Choosing the Right Spray Paint
The type of spray paint you choose depends on the nature of your project. Acrylic spray paints are ideal for artistic endeavors and crafts, while enamel paints are more suited for industrial and outdoor applications due to their durability. For projects involving metallic surfaces, opt for specialized metallic spray paints that offer rust protection and a polished finish.
Moreover, eco-friendly spray paints have gained popularity in recent years, providing vibrant results without compromising on environmental safety. These paints emit fewer harmful fumes and are available in a wide range of colors and finishes.
Benefits of Professional Assistance
While DIY spray painting can be rewarding, enlisting professional help for large-scale or intricate projects guarantees superior results. Professionals in Premium Decorating Services bring a wealth of experience and knowledge to the table. They understand the nuances of different surfaces, materials, and techniques, ensuring flawless application every time. Whether you're renovating your home or enhancing commercial spaces, these experts can tailor their services to meet your specific needs.
Conclusion
Spray painting is a dynamic and efficient way to revamp any space or object, offering an array of possibilities for creative expression. By mastering the basics and using high-quality materials, you can achieve results that are both stunning and durable. For those seeking perfection or tackling challenging projects,Premium Decorating Services provide the expertise and precision needed to bring your vision to life.
0 notes
Text
Essential Garage Tools and Equipment for Every DIY Enthusiast

Whether you're a DIY enthusiast or a professional mechanic, having the right garage tools and equipment can make all the difference in achieving quality results with ease. A well-stocked garage not only enhances efficiency but also opens up new possibilities for repairs, maintenance, and creative projects. Here’s a guide to some of the essential tools and equipment that every garage should have.
Basic Hand Tools
Starting with the basics, hand tools are the foundation of any well-equipped garage. Screwdrivers, wrenches, pliers, and hammers should be readily accessible. These tools cover a wide range of everyday tasks, from assembling furniture to fixing loose bolts. A socket set with various socket sizes is also essential for tackling automotive and mechanical tasks. Quality hand tools are typically built to last, providing reliable service for years.
Power Tools
Power tools make work faster and easier, especially for larger projects. Drills, impact drivers, and rotary tools are key power tools for drilling holes, tightening screws, and performing a variety of tasks. A cordless drill, in particular, adds convenience and flexibility. For cutting materials like wood, metal, or plastic, a jigsaw or circular saw can be incredibly useful. Angle grinders and sanders are also handy for smoothing surfaces and polishing metal parts.
Air Compressor and Pneumatic Tools
An air compressor is a versatile piece of garage equipment that powers various pneumatic tools like air wrenches, spray guns, and air blowers. Air compressors come in different sizes and capacities, so choose one that fits your needs. Having a compressor and pneumatic tools can significantly increase productivity, especially for tasks like inflating tires, painting, or loosening tough bolts.
Lifting Equipment
When it comes to working on vehicles, lifting equipment is essential. Floor jacks, jack stands, and ramps allow safe access to the underside of a car for repairs and maintenance. A hydraulic floor jack with a high lifting capacity is ideal for most home garages, and sturdy jack stands add an extra layer of security. For more advanced needs, a car lift may also be worth considering if space allows.
Workbench and Storage Solutions
A solid workbench is a must-have for any garage. It provides a stable surface for working on projects, whether you're cutting, drilling, or assembling. To keep your tools organized and accessible, invest in tool cabinets, pegboards, and shelves. Good storage solutions help prevent clutter and make it easy to locate tools when needed, ultimately saving time and frustration.
Safety Gear and Lighting
Safety should always be a priority in any garage workspace. Safety glasses, gloves, and ear protection help shield you from potential hazards. Additionally, a well-lit workspace reduces the risk of mistakes and accidents. Consider installing overhead lights, task lights, or portable work lights to keep your workspace adequately illuminated.
Specialty Tools for Specific Needs
Depending on your projects, you might need specialty tools like a torque wrench for precise tightening, a multimeter for electrical diagnostics, or even a welding machine. These tools may not be necessary for everyone, but they’re invaluable for specialised tasks, especially in automotive work and metal fabrication.
Bottom-line
Having a well-rounded collection of garage tools and equipment is an investment that pays off over time. With these essentials, you'll be equipped to handle a range of projects and repairs efficiently, ensuring your garage becomes a true hub for productivity and creativity.
0 notes
Text
Chandelier Cleaning: How to Keep Your Chandeliers Sparkling and Beautiful

A chandelier can be the star of any room, adding elegance, style, and warmth to your space. However, maintaining that luxurious glow requires regular Chandelier cleaning to remove dust, dirt, and grime that can accumulate over time. In this article, we'll share expert tips and techniques to help you clean and maintain your chandelier so it always looks as radiant as the day you bought it.
Why Chandelier Cleaning is Essential
Chandeliers are often high up and hard to reach, which makes them prone to collecting dust and cobwebs. A clean chandelier reflects light better, giving your room a brighter and more inviting look. Regular chandelier cleaning also prevents dirt from building up and keeps the fixture in optimal condition, extending its lifespan.
Step-by-Step Guide to Chandelier Cleaning
To achieve a sparkling chandelier, follow these simple steps:
Turn Off the Power and Let the Bulbs Cool
Safety is key. Before starting your chandelier cleaning, turn off the fixture's power and allow any hot bulbs to cool down completely.
Prepare Your Cleaning Supplies
Gather a microfiber cloth, a soft-bristle brush, a mild glass cleaner, and a stable ladder. You might also want a chandelier spray cleaner, which can be helpful for light maintenance between deep cleans.
Place a towel or drop cloth under the chandelier to catch any drips or fallen pieces.
Dust the Chandelier Gently
Use a soft, lint-free cloth or brush to remove dust and cobwebs. Be gentle to avoid scratching the glass or crystal pieces.
For particularly delicate chandeliers, consider wearing cotton gloves to prevent any oils from your fingers from transferring onto the glass.
Choose Between On-the-Spot or Hand-Washing Cleaning
If your chandelier has intricate crystals or glass pieces, it may be best to remove them for a thorough clean.
For simpler designs, a chandelier spray cleaner may be used while the chandelier remains hanging. Spray each section lightly and allow any dirt to drip down.
Hand-Clean Crystals and Glass
For a deep clean, carefully remove each piece of glass or crystal. Soak each piece in warm, soapy water, then rinse thoroughly and dry with a lint-free cloth.
To ensure the correct reassembly, label each part as you go, especially if the chandelier has a complex design.
Clean the Frame and Bulbs
Wipe down the chandelier’s frame, using a damp cloth for any non-crystal surfaces. Avoid spraying cleaners directly onto the frame, as excess moisture could damage it.
Clean the bulbs with a dry cloth. Replacing worn-out bulbs during cleaning is also a good idea.
Reassemble and Polish
Once everything is completely dry, reassemble your chandelier carefully. Give it a final polish with a microfiber cloth to ensure a streak-free shine.
How Often to Clean Your Chandelier
The frequency of chandelier cleaning depends on the chandelier’s location and the surrounding environment. As a rule of thumb:
Dusting should be done every 2-3 months.
Deep cleaning may be needed every 6-12 months, or more often in high-traffic or dusty areas.
DIY Chandelier Cleaning Solution
For a safe, budget-friendly cleaner, you can make a DIY chandelier cleaning solution using household ingredients:
DIY Recipe: Mix equal parts vinegar and water in a spray bottle, adding a few drops of dish soap for extra cleaning power. This solution cuts through grime and leaves glass and crystals sparkling.
Tips for Keeping Your Chandelier Clean Longer
Use a feather duster regularly to prevent dust build-up.
Consider LED bulbs, which emit less heat than traditional bulbs, helping reduce dust attraction.
Install an air purifier to reduce airborne dust particles, particularly in rooms with large chandeliers.
When to Consider Professional Chandelier Cleaning Services
For high, elaborate, or delicate chandeliers, professional cleaning services may be the best option. These experts have the equipment, tools, and experience to clean even the most complex fixtures safely and efficiently.
youtube
Conclusion
Chandelier cleaning may seem challenging, but with the right techniques and a bit of patience, you can easily maintain a stunning, clean chandelier that lights up your home. Regular cleaning not only keeps your chandelier looking beautiful but also improves its performance and longevity. A sparkling chandelier brings elegance and light to your space, making every room feel a little more luxurious.
1 note
·
View note
Photo

Binding Wire Safety: Best Practices for Preventing Accidents
Binding Wire Safety: Best Practices for Preventing Accidents
When it comes to working with binding wire, safety should always be a top priority. Whether you are a construction worker, contractor, or DIY enthusiast, following best practices for preventing accidents can help ensure a safe and productive work environment.
At Shree Ji Steel Private Limited, a leading supplier of mild steel and hot rolled materials in India, safety is of the utmost importance. While our focus is on providing high-quality materials for various construction and industrial projects, we also place a strong emphasis on promoting safety practices among our customers and partners.
One of the most common uses of binding wire is in the construction industry, where it is used to secure reinforcing bars (rebars) in concrete structures. However, working with binding wire can be hazardous if proper safety measures are not followed. To help prevent accidents and injuries, here are some best practices to keep in mind:
Wear appropriate personal protective equipment (PPE): When handling binding wire, it is essential to wear PPE such as gloves, safety glasses, and sturdy footwear to protect yourself from cuts, abrasions, and eye injuries.
Use the right tools for the job: Make sure you are using the correct tools for cutting and bending binding wire. Using tools that are not designed for the task can increase the risk of accidents.
Inspect the wire before use: Before using binding wire, inspect it for any defects, such as rust, kinks, or sharp edges. Using damaged wire can lead to accidents, so it is essential to discard any defective pieces.
Secure loose ends: When tying off binding wire, make sure to secure the loose ends properly to prevent them from unraveling and causing injuries.
Store wire safely: Store binding wire in a dry, well-ventilated area away from moisture and corrosive substances. Proper storage can help prevent rust and deterioration, making the wire safer to use.
Follow proper lifting techniques: When handling heavy coils of binding wire, use proper lifting techniques to prevent strains and injuries. Avoid bending at the waist and instead lift with your legs to reduce the risk of back injuries.
By following these best practices for binding wire safety, you can help prevent accidents and injuries in the workplace. At Shree Ji Steel Private Limited, we are committed to promoting safety and providing high-quality materials to our customers across India. With our extensive range of mild steel and hot rolled products, we are your go-to supplier for all your construction and industrial needs.
Stay safe, stay informed, and remember to prioritize safety when working with binding wire. Shree Ji Steel Private Limited – your trusted partner for quality materials and a safer work environment.
Product Page: https://shreejisteelcorp.com/binding-wire/
Website: https://shreejisteelcorp.com/
0 notes
Text
DIY Log Slice Display Dome
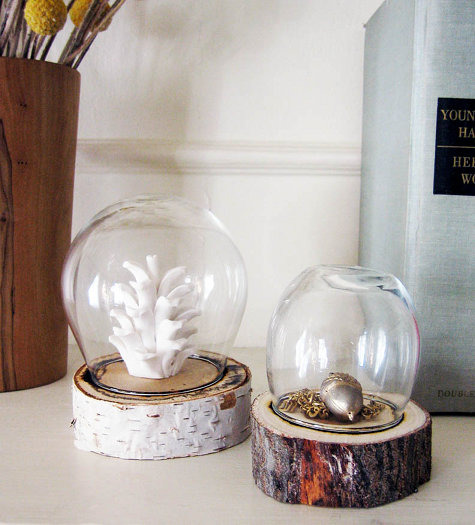
Project by Kate:
i just want to say that i envy all of you out there with a working fireplace. i have very fond memories of sitting around a crackling fire in maine, and watching my dad place freshly chopped firewood in a huge pile outside. that being said (anyone else watch curb your enthusiasm?), i am glad i can bring wood projects into my home on a smaller scale while i enjoy the mild california winter. the month of december will feature wood projects for decorating and gift giving, and they are all fairly easy projects requiring few tools. this first project is very special to me because i have always loved miniatures, and now i have a nice homemade display jar for all of my little treasures. these would make a charming hostess gift, or great holiday table decor; i can see a cluster of them with fresh pinecones and sprigs of winter greens tucked inside. all you need is a saw, and you could even skip the wood-burned indentation ring if you were in a hurry, but i think it adds a nice touch. plus that way i get the brief nostalgic experience of smelling burning wood! have fun! – kate
materials:
1. wooden log (if you want to skip the sawing wood step, you can buy wood coasters at various places. i found these simple ones online)
2. saw (chop saw or a regular tooth saw and mitre box)
3. pencil
4. stemless wine glass, drinking glass, or a clean glass jar (this is depending on what shape you want your jar to be. i found stemless wine glasses had a nice domed shape, but a jar would also look nice. if you want to size these up, i recommend using mason or other food container jars or simple glass vases as cheap options)
5. wood burning tool (these are sold at craft and hobby stores, and range in price from $12 up to $30 or so. you need one with a medium rounded tip, or you can purchase the tip separately)
cost:
stemless wine glasses: $3 for two at crate and barrel wood logs: free (cut from logs in my backyard) wood burning tool: $15
time:
2 hours
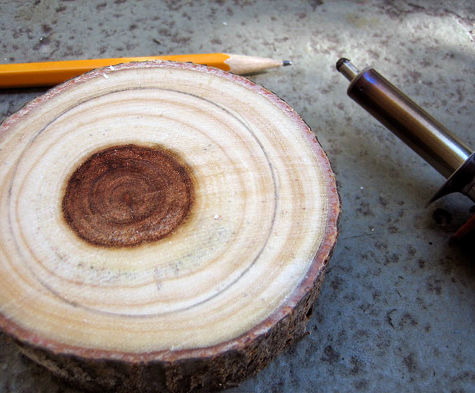
instructions:
1. cut your log slice. it can be anywhere from 1″ – 3″ thick, but make sure both sides are flat so it sits level.
2. flip your glass over and center it in your log slice. trace around the rim with a pencil to leave a ring template on your log.
3. turn on your burning tool and let it heat up. working very slowly and carefully, burn the ring into the wood so it is is indented by about 1/8 to 1/4 of an inch. when you are tracing the ring with the burner, work on the inside of the line because the line you traces sits directly outside the actual rim, and you want the rim to fit into the groove you are burning. stop every few minutes to place the glass in the ring to see if your shape is right. i recommend not trying to draw the entire ring at once with the burner, but instead burn tiny dots one right next to each other and then run over them again and again to connect them into a continuous shape.
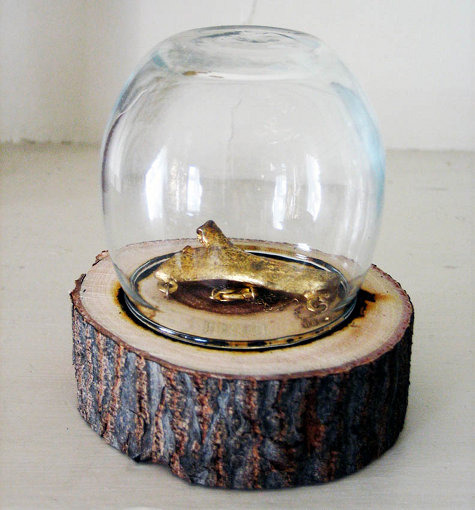
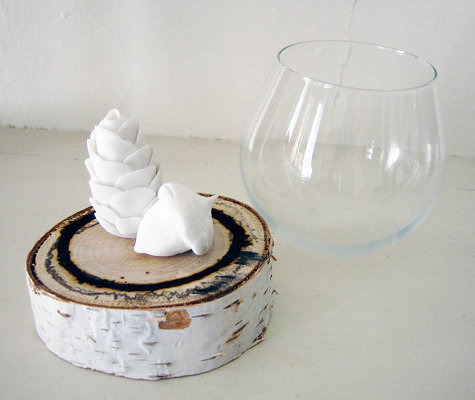
4. switch off your burning tool and let it cool down. brush off the top of your wood and place you glass upside down. the rim of the glass should fit into the burned ring, preventing the glass form slipping around.
note: you do not need the indentation ring, but it does help keep the glass positioned and the burned wood pattern is actually quite lovely. but the glass can also simply sit atop the log if the log is level.
3 notes
·
View notes
Text
9 Reasons Why Window Glazing Is Best Done By Professionals
Window installation and maintenance can seem straightforward, but it often requires a level of expertise to ensure the job is done correctly and safely. Many people may be tempted to take on these tasks themselves to save money, but the advantages of hiring experienced double glazing Canberra experts can significantly outweigh the costs.
The following list details the compelling reasons why trusting professionals for window glazing is the best choice.
Precision and Expertise in Installation
Professional window technicians have the skills and experience to ensure precise fitting and sealing. This accuracy is crucial because even a small gap or misalignment can lead to issues like drafts, moisture infiltration, and heat loss. Experienced installers use specialised techniques and tools to guarantee a perfect fit, resulting in improved energy efficiency and reduced long-term costs for heating and cooling.
Enhanced Safety Measures
Working with glass and window materials can be hazardous, especially for individuals who lack training. The risk of cuts, falls, or other accidents is significantly higher when dealing with large or heavy panes. Professional installers are trained to handle these risks safely. They use appropriate safety equipment and follow industry protocols to prevent accidents, which also helps avoid the liability that homeowners might face if a mishap occurs during a DIY installation.
Access to Quality Materials
Experts often have connections with reputable suppliers, giving them access to high-quality materials that may not be available to the average consumer. These materials not only last longer but also contribute to the overall efficiency and performance of the installation. Whether it’s durable window frames, energy-efficient glass types, or specialised sealing materials, professionals ensure that all components are of the highest standard.
Proper Handling of Waste and Old Materials
Removing old windows and installing new ones generates waste, which can be challenging to dispose of correctly. Professionals not only handle the installation but also take care of cleaning up and safely disposing of old materials, including hazardous debris like shards of glass. They often have protocols for recycling and proper disposal, ensuring that the process is environmentally friendly and complies with local regulations.
Cost-Effective in the Long Run
While hiring a professional may seem more expensive upfront, it can save money over time. Incorrectly installed windows can lead to increased energy bills, frequent repairs, and even water damage. When experts do the job, they reduce the likelihood of these problems occurring, ensuring that the installation is durable and up to code. Additionally, many professionals offer warranties on their work, providing added peace of mind.
Efficient Project Completion
Professionals can complete window installations much faster than a homeowner doing the job for the first time. They understand the processes, potential challenges, and techniques to streamline the project. Their efficiency reduces the amount of time your home is exposed to the elements, minimising discomfort and preventing potential damage caused by prolonged exposure to outdoor conditions.
Improved Energy Efficiency
Proper window installation by professionals ensures that all seals and frames are correctly placed to prevent air leakage. This attention to detail improves the overall energy efficiency of a home, helping to maintain consistent indoor temperatures. Reduced air leaks and better insulation can significantly lower heating and cooling costs, making professional installation a wise investment for energy-conscious homeowners.
Comprehensive Knowledge of Building Codes and Regulations
Window installation is not just about fitting the materials correctly; it also involves adhering to local building codes and safety standards. Professionals are familiar with these requirements and ensure that the installation complies with all regulations. This expertise is particularly important for homes in specific areas where window standards are mandated for safety and energy efficiency. Ensuring compliance can save homeowners from fines or the need for future adjustments.
Access to Custom Solutions and Options
Not all windows are the same, and sometimes, homeowners require custom solutions to meet specific aesthetic or functional needs. Professional installers can provide options that suit unique requirements, such as soundproofing or specific styles that enhance the appearance of a property. Their experience enables them to recommend the best materials and designs for particular conditions, ensuring the final installation meets the homeowner's expectations.
While it may be tempting to tackle window installation or replacement as a DIY project, the benefits of hiring a professional outweigh the potential savings. From ensuring safety and compliance to providing access to high-quality materials and custom solutions, professionals offer advantages that lead to better results and long-term savings. Investing in expert installation guarantees peace of mind, improved efficiency, and the best possible outcome for your home.
0 notes
Text
The Dangers of DIY Plumbing
DIY (Do-It-Yourself) projects have surged in popularity as homeowners seek to save money and take control of their home maintenance. While there are many tasks that are suitable for the DIY approach, being a plumber Brisbane North professional is one area that often proves more complicated than it appears. Despite the allure of tackling plumbing projects independently, the risks associated with DIY plumbing can lead to significant consequences. Here’s a deeper dive into the dangers of undertaking plumbing repairs without professional assistance.
1. Lack of Expertise
Plumbing systems are intricate, comprising various components like pipes, fixtures, valves, and drainage systems that work together to deliver water and remove waste. This complexity requires a certain level of expertise to diagnose and repair effectively. Many homeowners lack the training and experience needed to identify the root cause of plumbing issues. For instance, a leaking pipe may seem like a straightforward problem, but it could be a symptom of a larger issue, such as a failing water heater or a compromised foundation.
Without proper knowledge, homeowners risk making the situation worse, leading to additional damage and more costly repairs. In contrast, licensed plumbers undergo rigorous training and certification processes, equipping them with the necessary skills to handle a variety of plumbing challenges effectively.
2. Injury Risks
Plumbing tasks can involve physical labour and the use of various tools, which can pose significant injury risks. Common injuries associated with DIY plumbing include:
Back injuries from lifting heavy fixtures or bending awkwardly for extended periods.
Cuts and bruises from handling sharp tools, pipes, or even broken glass from fixtures.
Burns or scalds from working with hot water or heated equipment.
Electrocution if electrical components are involved, especially in older homes where wiring may be outdated or improperly installed.
Professional plumbers are trained in safety protocols and have the experience to navigate potentially hazardous situations safely, significantly reducing the risk of personal injury.
3. Water Damage
One of the most severe consequences of improper DIY plumbing repairs is water damage. Even a small leak can quickly escalate into a major issue if not addressed properly. For example, a seemingly minor leak under a sink can lead to mould growth, rotting wood, and structural damage if left unchecked.
The cost of repairing water damage can far exceed the initial savings from attempting a DIY fix. Water damage not only requires immediate repairs but also potential remediation for mould, which can pose serious health risks to residents. A professional plumber can identify and address leaks before they become catastrophic, ensuring the integrity of the home’s structure.
4. Code Violations
Plumbing work is regulated by local building codes and standards designed to ensure safety and functionality. DIY plumbing repairs may inadvertently violate these codes, leading to fines and complications when it comes time to sell the home. For instance, improper installations can lead to code violations that necessitate costly rework to bring the plumbing up to standard.
Licensed plumbers are knowledgeable about local codes and regulations, ensuring that all work is compliant. This not only provides peace of mind but also protects homeowners from future legal and financial issues.
5. Increased Costs
While the primary motivation for DIY plumbing is often cost-saving, the reality is that mistakes made during DIY repairs can lead to increased expenses in the long run. Homeowners who attempt to fix plumbing issues may find themselves facing additional repair costs when their initial efforts fail.
For instance, if a DIY repair causes further damage or if a plumbing emergency arises due to improper work, the cost of hiring a professional plumber to correct the mistakes can be significantly higher than it would have been to hire them from the outset. Additionally, warranties on fixtures or systems may be voided if not installed by a licensed professional, leading to further financial loss.
6. Time Consumption
Many homeowners underestimate the time required for DIY plumbing projects. What may seem like a simple repair can turn into an all-day affair, especially for those unfamiliar with plumbing systems. Time spent researching how to fix the problem, purchasing supplies, and executing the repair can add up quickly.
In contrast, professional plumbers can often complete repairs efficiently due to their experience and expertise. This minimises disruptions to daily life, allowing homeowners to focus on other priorities rather than spending hours on a plumbing project that could have been handled by a professional in a fraction of the time.
7. Hidden Issues
Plumbing problems often have underlying issues that are not immediately apparent. For example, a persistent clog may indicate a more serious problem, such as tree roots invading sewer lines or a broken pipe deep within the system. Homeowners tackling DIY repairs may fail to address these hidden issues, resulting in recurring problems that lead to additional repair costs.
Professional plumbers conduct thorough inspections, using specialised tools like video cameras to assess the condition of pipes and identify underlying issues. This proactive approach helps ensure that all aspects of a plumbing problem are addressed, preventing future headaches and expenses.
8. Contamination Risks
Working with plumbing systems can expose homeowners to various harmful substances, particularly when dealing with sewage or old plumbing systems. Contaminated water can harbour bacteria, viruses, and other pathogens that pose serious health risks. Homeowners may unknowingly expose themselves and their families to these dangers when attempting DIY plumbing repairs without proper safety precautions.
Professional plumbers are trained to handle hazardous materials safely, using appropriate protective gear and sanitation methods. This not only protects the plumber but also ensures the safety of the household.
9. Quality of Work
DIY plumbing repairs can lead to subpar workmanship, which may not hold up over time. Homeowners might cut corners, use inferior materials, or skip crucial steps in the repair process, resulting in a system that is more prone to future failures. This compromises the quality of the plumbing work and can lead to frustration down the line.
Professional plumbers take pride in their workmanship, often backed by warranties for their services. This guarantees that the repairs will be done correctly and last longer, providing homeowners with peace of mind.
While the DIY approach can be appealing, plumbing is one area where the risks often outweigh the rewards. The potential for injury, water damage, code violations, and hidden issues makes it imperative to consider hiring a professional plumber for any significant plumbing repairs or installations. By investing in professional expertise, homeowners can ensure the safety and integrity of their plumbing systems, ultimately saving time, money, and headaches in the long run.
0 notes
Text
The Complete Guide to Diamond Blades for Concrete Cutting and More
Diamond blades are essential for all professional and DIY workers to perform critical deep-cutting under rigid objects like concrete, stone, and tiles. For the same purpose, getting the perfect set of suitable diamond blades online is essential if you plan to perform deep cutting for professional purposes or DIY projects. In this blog, you will learn everything about diamond blades, from the different types to concrete cutting saw blades, hand saw cutting blades, and diamond ring saw blades available online in Australia.
Understanding Diamond Blades
This type of grinding wheel comprises synthetic diamonds embedded in a metal matrix (the base). The diamonds act as the blades and make the cuts as they move against the material. What is important is what the diamonds are made of and how they’re bonded to the metal matrix – these two factors play a big part in determining whether the blade cuts well and how long it lasts as a cutting tool.
Concrete Cutting Saw Blades Online in Australia
The blade used for concrete cutting plays a vital role in cutting time and safety. Concrete Cutting Saw Blades Online in Australia and reinforced concrete are designed according to the abrasive nature of concrete and have more significant segments with concentrated diamond portions for faster cutting and a longer lifespan.
You have several options if you wish to buy a concrete cutting saw blade online in Australia. Selecting a blade that suits your saw or the type of concrete you are cutting is imperative. You can buy an ideal blade for your DIY home project or a large construction site.
Shop Hand Saw Cutting Blades Online in Australia
They are used for cutting concrete, brick, and metals by hand saw cutting blades, which offers the best solution for tight spaces and just cutting.
Should you wish to buy a high-diamond-content hand saw blade online in Australia, be sure it is made of high-quality diamonds and the proper matrix (bond) for the material you’re cutting. The appropriate Hand Saw Cutting Blade Online in Australia can make the difference between an easier, more effective job—demolition work or intricate stonework.
Buy Diamond Ring Saw Blades Online in Australia
A diamond ring saw blade specialises in cutting intricate shapes and curves from glass, tile, and stone. The blade is literally a ring that allows you to swing it in an omnidirectional plane.
If you go on the web to Buy Diamond Ring Saw Blades Online in Australia, check out your ring saw model and make sure that you purchase the right blade. The blades are made for artists, tile setters, and everybody who needs to be able to cut with extreme precision to detail and curves in the most complex material.
Tips for Choosing the Right Diamond Blade
Material: Choose a blade that corresponds with your cutting material. Every type of material requires a specific diamond grade and bond strength.
Masks: Make sure the blade fits your saw: check the arbour size and maximum RPM.
Cutting Types: Are you doing wet or dry cutting? This determines the type of blade you need.
Quality: It is well known for quality crafting from a renowned, safe, and suitable brand.
Conclusion
Nowadays, you can order diamond blades online, so it is not a problem to find a perfect blade for any future project: you might be looking for concrete cutting saw blades, hand saw cutting blades, or maybe for diamond ring saw blades cutting any one of them in Australia. Just make sure you have considered everything during the selection process. Of course, that can vary, but make sure you have thought about the requirements of each before making your purchase to have the result you want and ensure your safety.
SOURCE LINK :https://diamondbladesonline.com.au/the-complete-guide-to-diamond-blades-for-concrete-cutting-and-more/
0 notes
Text
Concrete Cutting Tips: Avoid Common Mistakes and Ensure Quality
Have you ever wondered how to cut concrete so well? How well you cut concrete may make or break your projects, regardless of your work ethic or preference for DIY. Some elements of the procedure may seem simple, but there are many chances to mess up, lose stuff, and become irritated. Avoid common mistakes and enhance your concrete cutting skills with our guidance on concrete cutting & core drilling in Brisbane.
Types of Concrete
Before learning about concrete cutting & core drilling in Brisbane, research its types. Each kind allows different cuts and methods. Regular concrete, reinforced concrete, and lightweight concrete are popular. Roads, walkways, and foundations benefit from regular concrete. The cement, water, sand, and pebbles make it sturdy enough for daily use. Reinforced concrete has steel bars or mesh to strengthen it. This makes it ideal for bridges and towering, heavy buildings. Its lightweight materials make it ideal for precast walls and roof constructions. You can cut concrete faster and easier if you know its properties.
Choose the Right Tools
Choosing the appropriate equipment is essential for clean cuts. Most jobs require a concrete saw. You can choose to walk behind or hold one. When working in a tiny space, a portable saw helps make accurate cuts. Small and light, these saws are easy to move around. Walk-behind saws are great for quick, large-area cutting. Additionally, use the right blade. Diamond blades are ideal because they last longer. It would help if you matched the blade width to the cut depth. Deep cuts are best with larger blades. Good tools help you cut better and last longer, making the procedure easier. Concrete wall sawing services Brisbane offers professional assistance.
Correct Safety Measures
Always prioritise safety when concrete cutting & core drilling in Brisbane with equipment. Cutting concrete requires safety glasses, gloves, and a dust mask. It’s dust, and other products may be harmful. If we work in a ceiling-heavy environment, we may also need a hard hat. Concrete dust can harm you. Hoovering or watering reduces dust and makes the workplace safer. Make sure your workspace is clean, and your tools operate before starting.
Cutting prep
Plan before cutting concrete. To avoid mistakes, measure twice and draw distinct lines before cutting. You can hire concrete wall sawing services Brisbane. Make straight, equal cuts with a chalk line or straight edge. Consider how the cutbacks will fit into the project’s design and existing structures. Cutting sequentially can simplify and reduce breaks. Cutting support bars the wrong way might damage the blade or undermine the structure. Remember that a good plan wins half the battle. Planning increases your chances of success.
Make proper cuts
Knowing when to utilize each cutting method is critical since they produce various cuts. Cutting a straight line while wet will keep the blade cool and reduce dust, extending its lifespan and sharpness. We should water the blade and cutting area before starting, as this softens the touch. However, a dry cut may be appropriate for minor projects where dust control is less essential. But the blade may deteriorate faster. A diamond-bladed hand-held saw is easier to use for bends and intricate shapes.
Avoiding heat
People mistakenly overheat the blade when cutting concrete. Too much heat can quickly dull our blade, making cutting concrete difficult and potentially harming it. Heat can bend or break the blade, making it unsafe. Monitor the blade’s temperature and cool it with water to maintain it. Are you cutting for a long time? Let the blade cool between cuts. Monitoring cutting speed can also assist. If you cut too fast or too slowly, it can get hot or stuck. Keep your blade at the appropriate temperature to create good cuts and extend its life, which speeds up your work and saves you money.
Beware After Cutting
To preserve your work, we as concrete cutters Brisbane must treat it well after cutting. Clear the waste, dirt, and broken concrete. Look for rough edges or crooked cuts—smooth rough edges with a tool for a clean finish. You may also repair cuts to keep water out and prolong concrete life. You may protect your items from water, stains, and wear by sealing. If you properly care for your project after cutting, your efforts will pay off. This will improve its appearance and durability.
Dealing with Mistakes
Any work may teach you something, including cutting concrete. After finishing a job, evaluate what worked and what didn’t. Consider what went wrong and how to prevent it. Writing down your lessons can improve your concrete-cutting skills and help you find work. Tell coworkers or friends about your experiences. Talking about your problems and solutions might help you learn and improve. Being a lifelong learner improves your concrete cutting skills and self-confidence. Choose CutCore for safe, high-quality concrete cutting. Our top-notch tools and expertise will make your projects shine.
Conclusion
To cut concrete well, you need precision, planning, and safety. By knowing about concrete types, having the necessary tools, and cutting properly, you may avoid typical blunders that lower work quality. Remember that every work improves and teaches you. Remember these guidelines to cut concrete effectively and build durable projects. To conclude, use the strategies to cut concrete. You will demonstrate your dedication to excellence and greatness with every cut, particularly if you need Concrete Cutters Brisbane professionals. CutCore provides precise concrete cutting services that improve every job.
SOURCE LINK : https://www.cutcore.com.au/blog/concrete-cutting-tips-avoid-common-mistakes-and-ensure-quality/
0 notes